Regular readers of this blog know that I like to talk about the idea of growing near-organic apples.
With the near-organic method, you spray as little as three times early in the season when the apples are still very small — starting when they first begin to grow. Then two more sprays are applies spaced about ten days to two weeks apart. If it is rainy during that time period, then another spray may be needed. After the third spray application, you stop spraying. By the way, I sometimes do a very early pre-blossom spray.
I use a general, all-purpose orchard spray mix, one with both fungicide and insecticide in the formula.
The reason why this technique works as well as it does is because it takes advantage of the life-cycles of orchard pests. Generally, the insects that cause the most damage to apples emerge early in the season. The spray knocks back the population of pests. Then once the spraying is over,the population of beneficial insects begins to grow and help keep pests in check. At least that’s one theory I’ve heard.
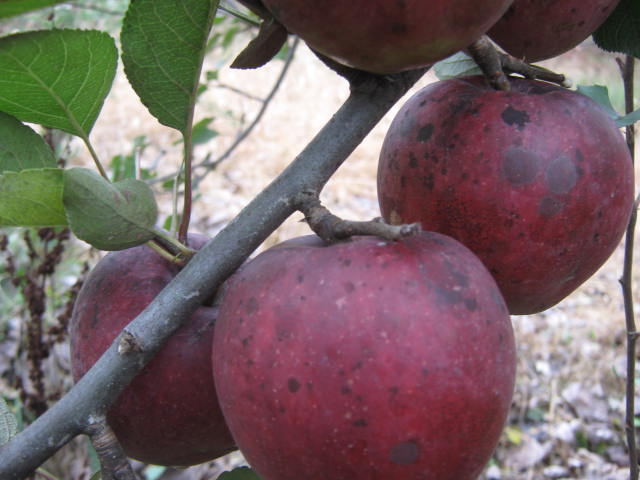
Minor surface discoloration was tghe only problem we had with our apples this year.
Through the season, as the apples grow in size, pesticide residue is washed off with the rain and breaks down in the sunlight, hence the name “near-organic”. There is no official term as “near-organic” but it helps to describe how the apples were grown.
The apples often have some discoloration due to harmless fungi on the outside surface of the skin. I just wash off what I can (or rub it off on my shirt) and eat the apple whole.
I’ve been using this method for many years and have had great success with it. It’s not a guarantee that it will work in your situation but it would be worth a try if you are aiming to reduce your use of pesticides while still having half way decent apples.
I certainly would not recommend it for someone who’s livelihood depends on their apple crop, but for a few trees in the backyard, it may be worth trying.
Bob