Strawberries are ready for picking! I always get a big kick out of picking that first strawberry out of my garden.
I have a major problem with moldy berries this year. Botrytis, also known as gray mold, has infected a fairly large percentage of my crop. It’s called gray mold because of the fuzzy gray appearance of the fungus covering the berries.
Like most molds, botrytis needs a damp environment to get a foothold. The regular rains we’ve had during this early ripening period has kept the plants damp encouraging the mold.
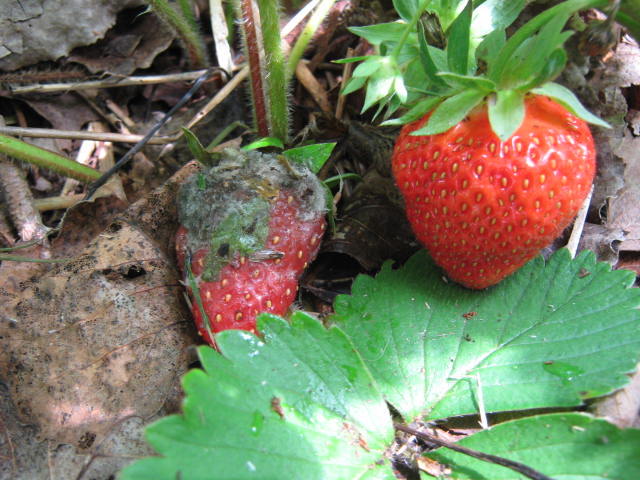
A healthy strawberry will easily become infected with gray mold when touching an infected berry.
Selecting a good planting site will eliminate a lion’s share of the mold problem. A large part of my problem is the location of the strawberry patch. It’s near the side of a building and is partially shaded by a couple of trees that grew since I started my strawberry patch, that is a recipe for disaster. If my strawberries were growing in full sun where there would have been plenty of air movement to allow the plants to dry off quickly, the mold problem would have been drastically reduced.
Strawberries touching the soil will also become infected with botrytis more easily. Strawberry farmers use straw as a mulch to help keep the berries away from direct contact with the soil.
Sanitation will help control gray mold. So, I’m picking off moldy berries as I come across them. If I don’t, they will release more spores and infect the other fruit.
It’s critical to refrigerate newly picked berries as soon as possible. Strawberries can look fine but still be infected with the mold. You’ve probably seen this in berries that have already been picked but left out in a warm spot, they quickly get moldy.
This will be the last season for my strawberries in that damp location. I’ve already picked out a nice sunny spot for my next strawberry patch.
Bob