This year we are planting a little over 10,000 bulbs for flowering in the spring; Tulips, Daffodils, Grape Hyacinths and a few others.
Over the years we have tried several methods and have tried several types of tools.
This photo shows a few of those bulb planting tools:
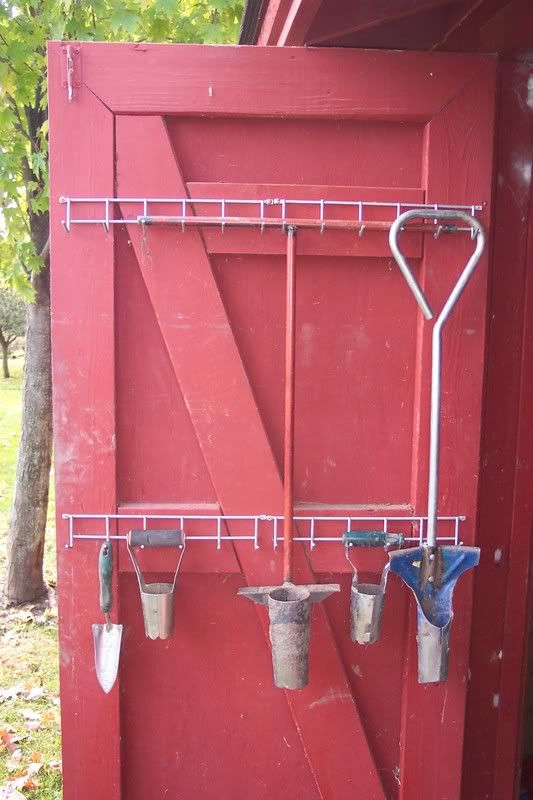
On the left we have our all purpose garden trowel, it is fine for planting a few dozen bulbs in prepared garden soil.
If you have more than a few dozen bulbs, the hand bulb planter (2nd from left) makes digging the planting holes quite a bit easier.
A more expensive, but handier bulb planter (2nd from the right) has a built-in mechanism that helps you remove the soil from the planter. You just squeeze the handle and it opens the digging part to release the soil to easily cover the newly planted bulb.
Next we have two versions of the “step-on” planter. These allow you to dig holes while standing. Since your feet can apply a lot more pressure, you can use these to plant directly into sod for “naturalizing” daffodils into an area. The blue colored planter works fine in light, sandy soil, but will bend under heavy use in denser soils. The red colored step-on planter is virtually indestructable…your feet will give out before this tool will. One drawback to these tools is the problem of soil sticking to the inside of the digger and not easily releasing.
All of these previously mentioned tools work fine if used where they are suited and you don’t have a whole lot of bulbs to plant.
Since we plant thousands of bulbs each year we have to bring out the heavy artillery:
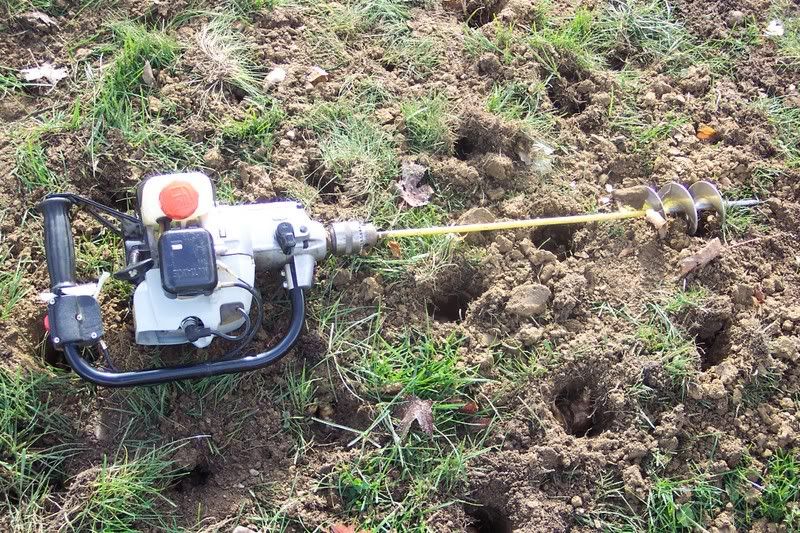
The gas powered auger!! G-R-R-R-R!!!
Until we acquired this beast, we really did use those manual tools hanging on the garden shed door.
This machine is almost essential for the number of bulbs we plant around here.
It is great for planting into sod, as it cuts right through the leaves, roots and all.
Watch out if you hit a rock while drilling at full speed! It can jar you so bad that you think your fillings will drop out!
This auger bit has drilled many thousands of holes and has hit gobs of rocks.
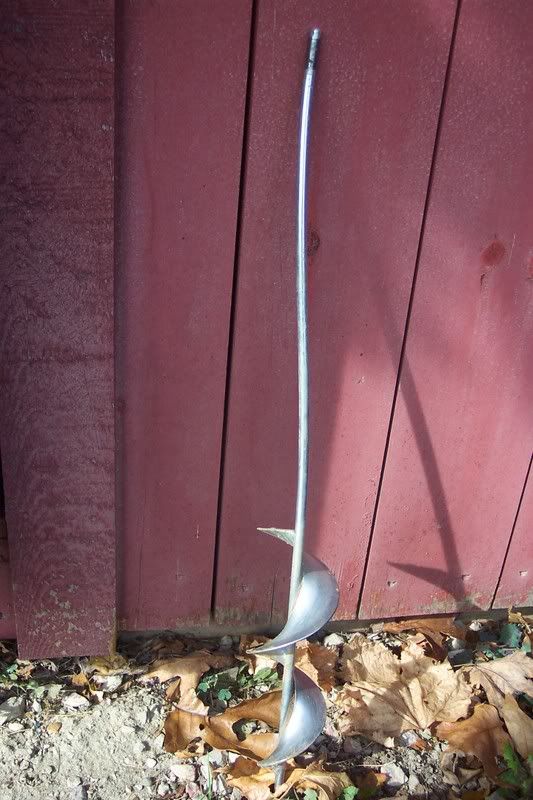
Look how the shaft has been twisted backward, causing the metal to form an “S” shape. This gives you some idea of the force involved when the bit strikes a rock.
I have other bits that are so worn that the point is gone and will only dig a small ”V” shaped hole.
Here is our set-up in action.
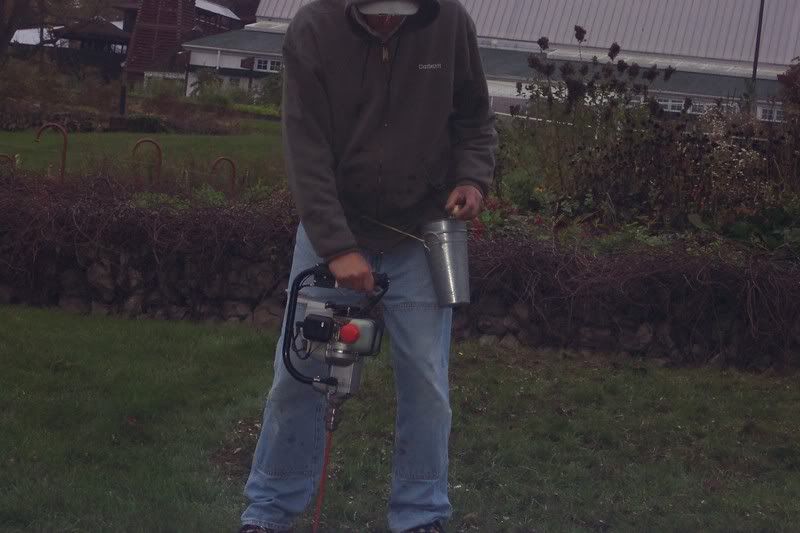
That’s me planting bulbs on a drizzly day. Note the metal can on my belt. This is where I carry the bulbs to be planted so I don’t have to bend down to pick up a bulb after every hole.
I drill a hole with two hands, then pull out the auger and grap a bulb from my holder and drop it into the hole. Later I come back and rake the soil back over the holes.
This jobs goes about four times faster if you have a helper placing the bulbs into the hole as you drill.
It’s a big job, and exhausting, but the rewards in the spring make it all worth while.
Bob
