The Yellow Farmhouse Garden

August 25, 2016

Saving radish seeds

Filed under: Seeds,Vegetables — bob @ 9:02 am

Our garden is big enough for things to go unnoticed plus I’m not as tidy a gardener as I should be.

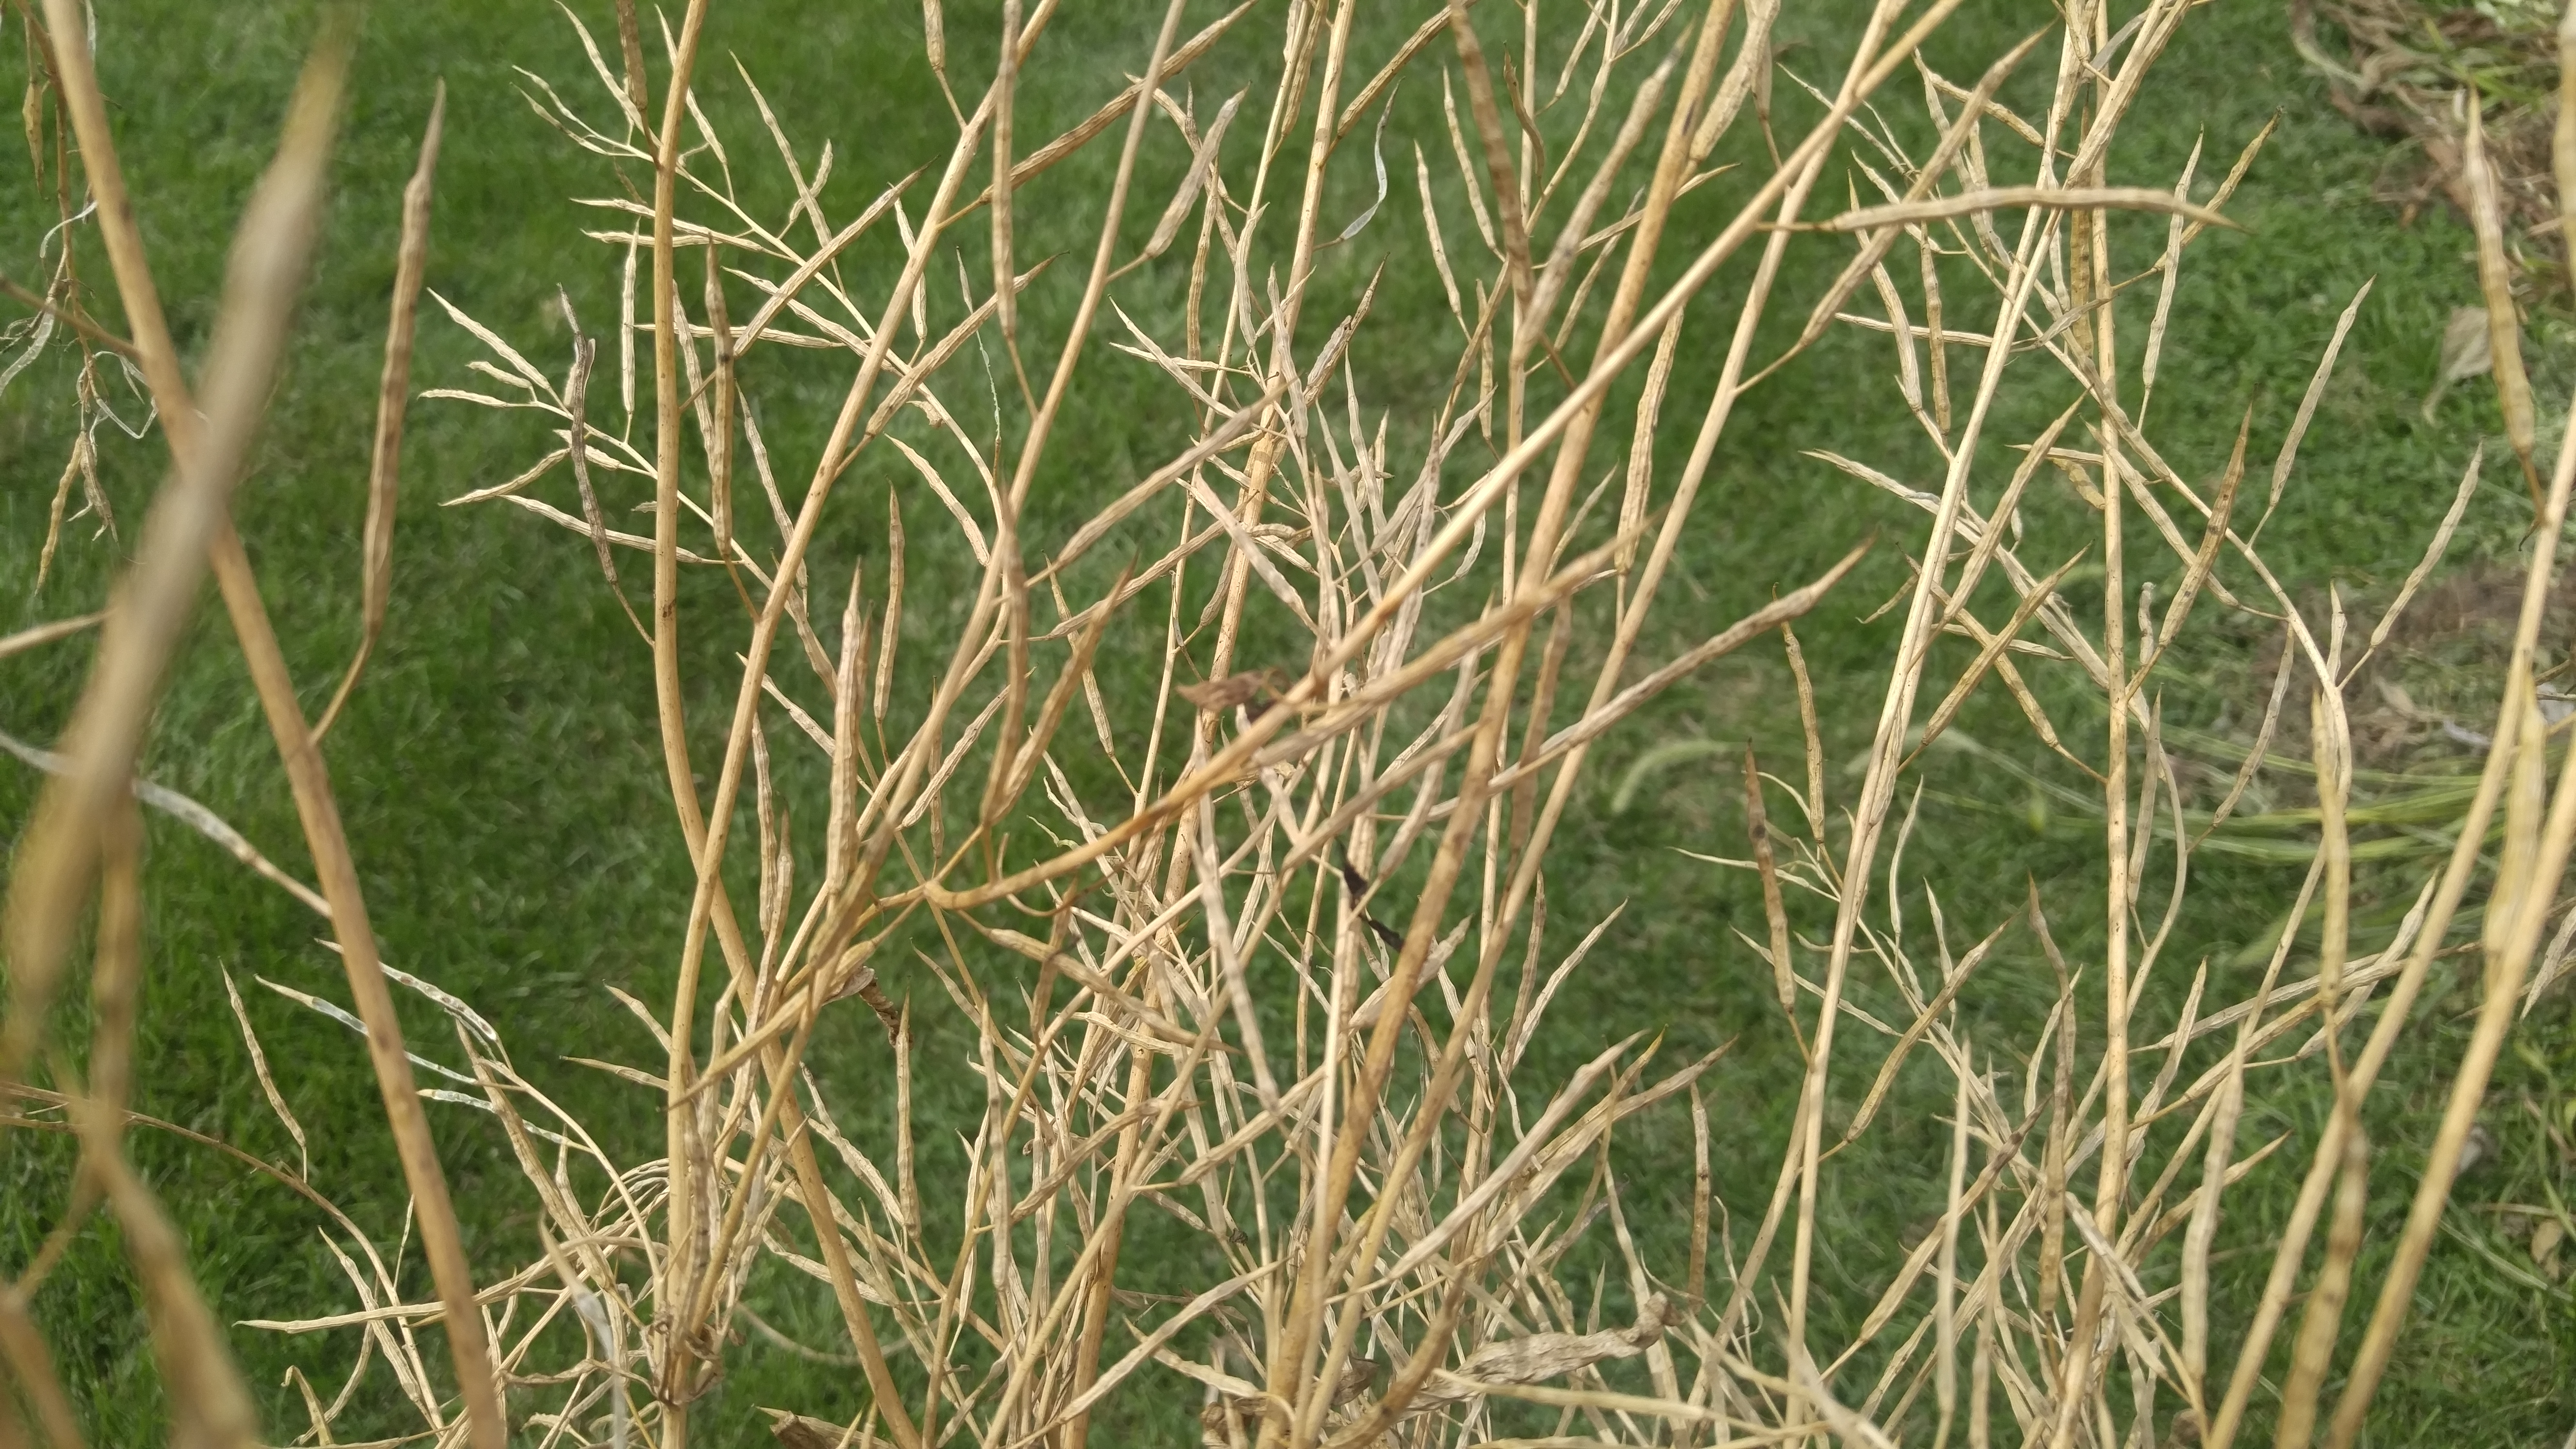
This week I found a radish that had gone to seed. Somehow, one radish managed to escape being harvested with the rest of the crop. It continued to grow, flower and produce seed pods right under my nose. Apparently, it got left behind when I was pulling radishes this spring.

If it is left to grow past the eating stage, a radish plant will  eventually send up a flower stalk. The  resulting flowers are then pollinated by insects. Seed pods that superficially resemble peas or beans arise from the pollinated flowers.

It takes nearly the entire growing season for radishes to produce seeds. This one’s pods were already dry and contained mature seeds.

Pods and seeds from this radish are somewhat smaller than typical radish seeds.

Pods and seeds from this radish are somewhat smaller than typical radish seeds.

radish seeds

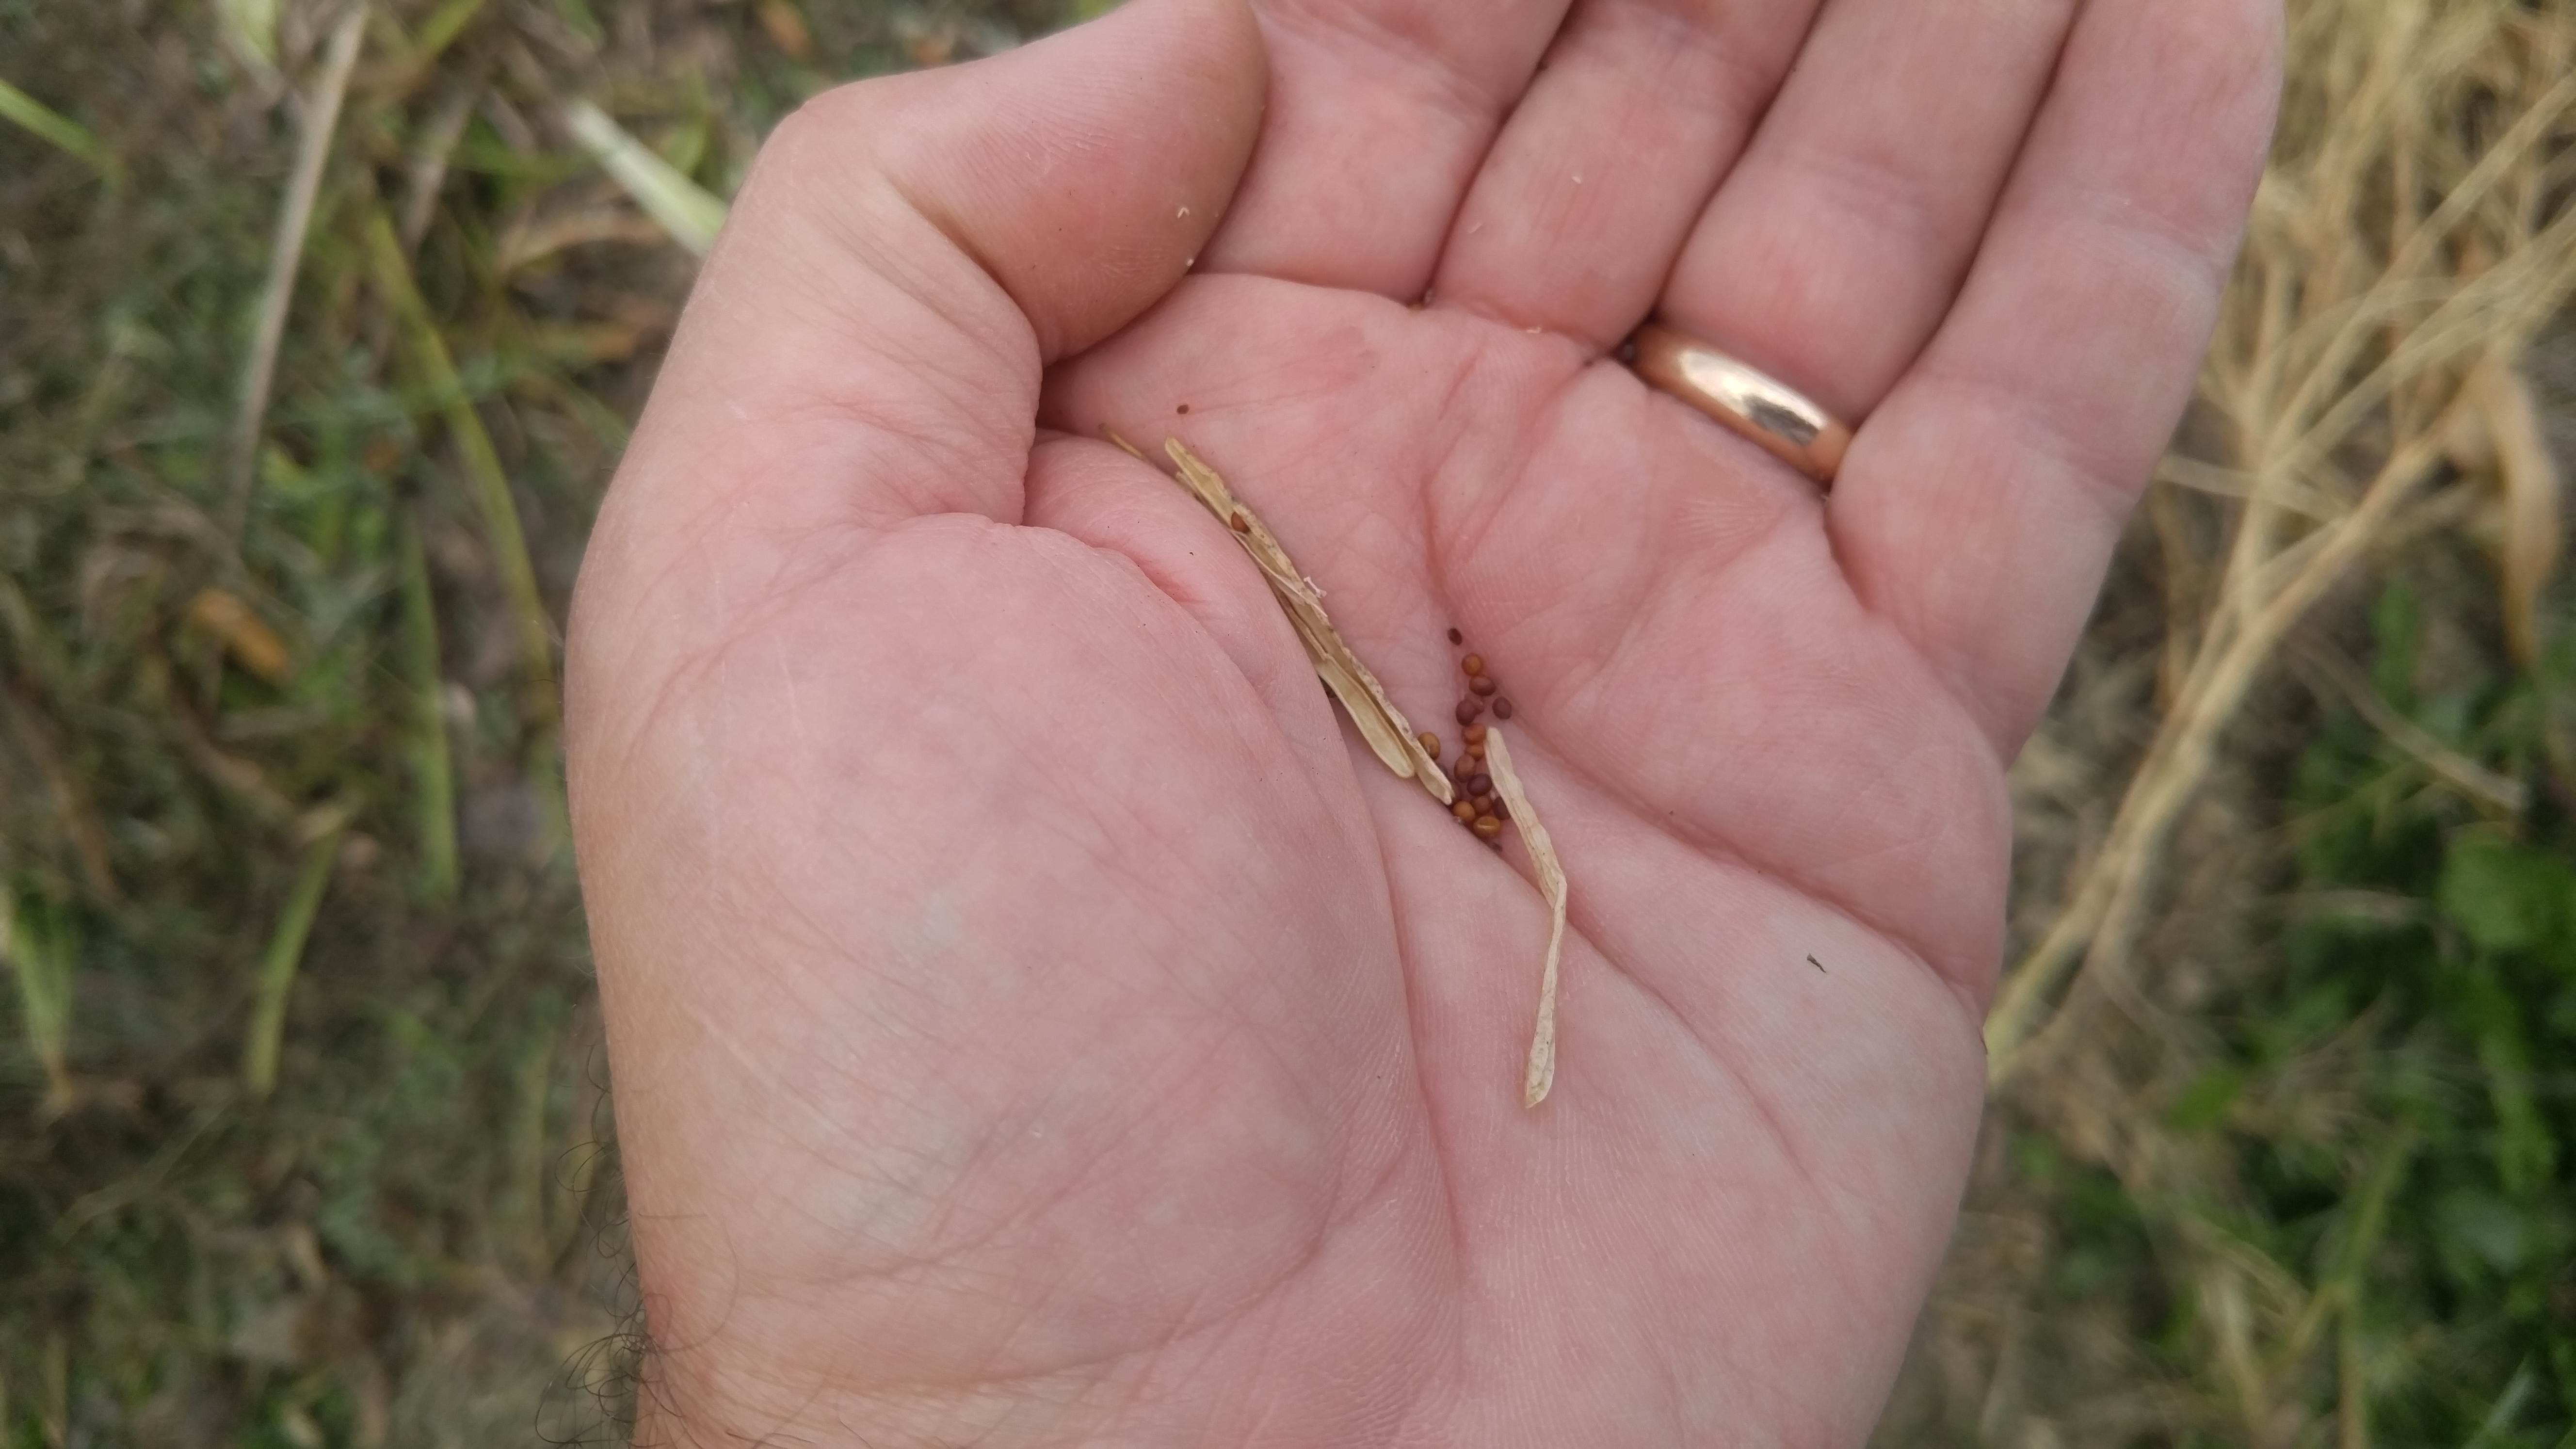
I’ll save a few seeds to try out next year.

Pollen from one variety of radish often will be carried by insects to a different plant and can easily cross-pollinate another variety of radish. Radishes don’t care if they are pollinated by one variety or another. The seeds resulting from the random cross may or may not produce a desirable eating radish when planted next year.

Since the one in my garden was the only one I found, the seeds should be OK — unless the pollinators brought in unknown pollen in from somewhere else. Professional seed growers separate their different radish varieties by a half mile or more.

Anyway, I’m keeping a few seeds to try out next season.

Bob

Powdery mildew on pumpkins

Filed under: Disease,Pesticides,Vegetables — bob @ 7:36 am

Growing pumpkins and squash has changed sine the early days early days of my career. Back then, pumpkins rarely had any problems whatsoever. You could just plant some seeds, keep the patch weeded and you were pretty much guaranteed a fine crop.

This year demonstrates how times have changed. In addition to the squash vine borer and squash bug that I talked about the last couple of weeks, we are now seeing powdery mildew on our pumpkins and squash.

Powdery mildew shows up as a white powdery-looking coating on the surface of the leaves. It eventually cause the leaves to turn yellow and die. Under certain conditions it will eventually kill the entire plant.

We’ve had textbook weather conditions for the development of powdery mildew. This type of mildew is a fungus that thrives when daytime temperatures are high and nighttime temperatures are low enough to form morning dew.

Some varieties of pumpkins and squash are more resistant to powdery mildew than others. Here are two different varieties growing side by side.

Some varieties of pumpkins and squash are more resistant to powdery mildew than others. Here are two different varieties growing side by side.

Unlike most other fungi, powdery mildew does not need liquid water to infect a plant and grow. High humidity within the leaf canopy provides the environment powdery mildew requires.

We do not see much powdery mildew during rainy years. As a matter of fact, one non-chemical approach to controlling powdery mildew takes advantage of this. Spraying the surface of the leaves with overhead irrigation will wash off much of the infection. It also will cause existing spores to absorb so much water that they burst, greatly reducing the source of new infection. This method only works if the area is well drained, otherwise you will end up causing other problems due to excess water.

Commercial chemical and organic formulas are available on the market to control this disease. I’ve been using a homemade concoction that has been working pretty well for me. I mix one table spoon of baking soda and two tablespoons of Murphy’s Oil Soap to a gallon of water. Spray it onto the leaves no more than every seven to ten days. It’s important to use this ratio, a stronger solution will damage leaves.

The spores from the species of powdery mildew that infects the squash family of plants does not survive Michigan winters. Spores are blown in to Michigan on southerly winds each spring to start a new cycle of disease.

Powdery mildew is very species specific, meaning each species of plant is infected a specific strain of fungus. For example, the powdery mildew that infects lilacs cannot spread over to squash and vice-versa.

This, I hope, will be the last problem we’ll have to deal with on our vine crops this year.

Bob


August 11, 2016

Control squash bugs now

Filed under: Insects,Vegetables — bob @ 10:23 am

The squash crop is looking pretty good so far but has had its share of problems.

Earlier in the season we were worried about squash vine borers moving in. Now we have a new pest that we need to take care of, squash bugs. A few days ago I spotted a very familiar sight, squash bug eggs. Once you’ve seen them, you’ll won’t forget them, especially after they’ve decimated your crop.

The eggs are small, shiny, metallic-looking usually found on the underside of the leaves. Many egg clusters I’ve seen this year are appearing on the top side of the leaf. Generally, the female lays clusters of eggs that follow the outline of the veins of the leaves giving the clusters a roughly triangular shape.

Down in the whorl of the leaf you can see a group of squash bug nymphs. On either side are egg masses. The white spots are where the bugs have been feeding.

Down in the whorl of the leaf you can see a group of squash bug nymphs. On either side are egg masses. The white spots are where the bugs have been feeding.

Squash bugs can do a lot of damage to your vine crops if you are not careful. Several years ago I had nearly half an acre of pumpkins that became infested with squash bugs. We tried battling them with the first line of attack, crushing their eggs whenever we came across them. After crushing literally hundreds of egg masses, it became apparent we were not going to be able to keep up with the insects. We ended up having to resort to applying an insecticide to save the crop.

The eggs hatch about ten days after being laid. The young newly hatched nymphs have a soft “skin” and are very susceptible to contact-type  insecticides. Spraying the nymph stage is your best chance to control these pests since the adult bugs are very tough and hard to kill.

Bob


August 7, 2016

Squash vine borer

Filed under: Insects,Vegetables — bob @ 8:35 pm

Squash vine borers are one of the most insidious insect pests in the garden. They attack many vine crops in the vegetable garden especially pumpkins, winter squash, summer squash such as zucchini yellow crook neck, and gourds. Sometimes they will infest muskmelons, watermelons and cucumbers. I’ve had many times in squash and only once in cucumbers.

Although the adult stage of the borer is a moth, it doesn’t look like or act like a moth. Unlike most moths it flies during the day. And instead of

fluttering around like a moth, it flies quickly, like a wasp.

The female adult lays its eggs on the base of the main vine, the eggs hatch and the baby borer eats its way into the vine and keeps feeding for about four weeks. It’s very possible that our squash and pumpkin vines have borers in them right now even though they are not exhibiting any visible symptoms.

At first it’s easy to confuse borer symptoms with drought. The plants wilt on hot, sunny days then recover overnight. If left alone, eventually the plants suddenly and completely collapse. The most startling symptom of a squash borer infestation is seeing healthy vigorous vines one day then seemingly the next day they are collapsed, wilted and dying.

I would sure hate to lose my healthy squash vines at this point in the season.

I would sure hate to lose my healthy squash vines at this point in the season.

You can help your vines minimize borer damage by taking advantage of  vine growth habits. You’ve probably noticed that squash and  other vines sometimes root themselves further away from the base of the plant. Those roots are actually functional and contribute to the vines growth. By encouraging rooting along different places along the vine, you can minimize the damage the borers do since the vine can get still get water and nutrients from the soil because of the extended root system. If the plant had to depend only on the roots at the base, no water would be able to reach those parts of the vine past the area damaged by the borer.


Rooting happens at the nodes along the vine.

Rooting happens at the nodes along the vine.

Rooting takes place at the nodes of the vine; those swollen spots on the vine from where the leaves grow. To encourage rooting, cover several nodes with a shovelful of garden soil. The secondary roots that form will support the plant even if the primary vine is destroyed by borers.

Bob


Correct way to sharpen a garden hoe

Filed under: Tools and Equipment — bob @ 8:12 pm

I’ve hoed a lot of long rows this season. Now it’s time to touch up the edge on my garden hoe.

The hoe I’ve been using for more than 15 years is a Dutch made, swan-neck style. Its light-weight head combined with a curved shank makes it a pleasure to use. As an added bonus it has an extra long handle which makes easier for a taller guy like me to operate. I don’t have to bend over in an exhausting, awkward position to reach the ground.

Nearly every hoe I’ve seen has the wrong bevel on the cutting edge. Right from the store, hoes often have a flat edge with no bevel at all. People take them home and immediately grind a sharp, angled bevel, like a wood chisel edge. That makes a very sharp edge but it does not last very long. It soon gets dull cutting through the soil. So gardeners end up working in their garden with a perpetually dull tool.

The proper way to form an edge on a hoe is to file a curved profile on the back of the hoe blade i.e. the side facing away from you when you use it. Keep the front of the blade metal flat, don’t grind it.

File the back of the blade, the side facing away from you when you hoe.

File the back of the blade, the side facing away from you when you hoe.


Imagine if you were to cut the blade in half with a hack-saw. Looking at the cross section of your blade edge with a microscope, you would see the front face ending at a right angle while the back face curves to meet the front edge.

Most of the wear on a hoe blade happens on the back side of the blade edge. A rounded back edge leaves much more metal on the side of the edge that is prone to wearing down.

You won’t be able to shave with that edge but it will last much, much longer in the garden.

Bob


Powered by WordPress