The Yellow Farmhouse Garden

May 26, 2008

Cool Spring

Filed under: Uncategorized — bob @ 5:52 pm

This year we have been fortunate to have a nice cool spring with a gradual warm up ( if you don’t count today).

One of the nice things about a cool spring, like the one we have experienced this year, is the way all of the spring flowers have lasted and lasted.

Remember all of those bulbs that were planted last fall?  (How We Plant Bulbs) Well, this year we really got to enjoy them. Last year the tulips were exposed to some unseasonably warm temperatures and only flowered for about three days. It took us longer to plant them than that!

Contrast that with this year’s flower display. Here is a photo of part of our bulbs. They are at about 80% blooming when this photo was taken.

These are tulips in the upper beds with Grape Hyacinths in the fore-ground.

Grape Hyacinth

A close up shot of those Grape Hyacinths.

Now you know what to say the next time a non-gardener complains about a cool spring!

Bob

May 18, 2008

Head start with potted plants

Filed under: Uncategorized — judy @ 11:40 am

Finally it feels like spring! I don’t mind this slightly cool weather. I seem to be able to work longer. Heat in the early spring is too much for me. So this is ideal for me to get my big pots planted that I put out on the extensive terrace that we have at the Matthaei Botanical Gardens.

The pots range in size from 2-3 gallons up to big square pots that are 2 ft sqaure by 2 1/2 ft. tall. I use more than 30 pots all together.

I’m using different soilless mixes this year. I can’t stress how important that is for growing plants in pots. Soilless mixes work so much better because real soil tends to compact too much in pots. Soilless mixes stay looser so roots have an easier time growing, get more air plus the peat moss and shredded bark in the mix holds moisture very well.

We are opting to use mixes with less peat moss and more shredded bark. The bark is a renewable crop while peat moss is being mined faster than it is be produced. Because it takes even longer than growing trees!

So I am using Metro Mix 380 and also Farard 52 mix. I’ll let you know the results at the end of the summer. I have the pots marked, as to which pot has which soil and I will compare how well they grow. I think I will have to fertilize differently but don’t know for sure yet. I will investigate the fertilizer requirements for the soilless mixes, and I’ll let you know

I usually fertilize every two to three weeks with a soluble fertilizer like Peterson’s or Miracle Grow. Don’t use fertilizer made for lawns. It has too much nitrogen and your plants will get to tall and floppy and more inviting to insect attack. I also use time released fertilizer pellets when I first plant. But don’t expect the timed released fertilizer to last all summer. It breaks down very rapidly when temperature are above 70 degrees.

Fertilizing that often , gives me great results. My coleus and cannas cause a lot of “oohs and ahs” when people see them. The coleus gets two and a half feet tall and nice and bushy and the cannas get 6 -7 ft tall in pots!

We could still get another frost so I won’t put anything out yet. I keep mine in the greenhouse but you could keep yours in a garage by a window or in the house by a window. If they are small enough and you have the energy put them out in partial sunlight on nice days but don’t forget to bring them in at night. You could start a number of plants in smaller pots to give them a head start and then transfer them to your biggest pots when you are ready to put them out. This year it doesn’t even look like I will put them out for Memorial day! It is still too cool at night.

So we may have to wait to enjoy our summer flowers but have you noticed that the spring flowers like daffodils and wild geranium and tulips are lasting longer this spring. One flower’s loss is another flower’s gain!

Bye for now, Judy

May 3, 2008

Asparagus Harvesting Time

Filed under: Uncategorized — bob @ 8:34 pm

The warmth of May along with our spring rain is waking up the asparagus.

We picked some last week in one of the asparagus beds. That bed is in a protected area on a southern slope so it always comes up quicker than the other bed which is in a damp area on a slight northern slope.  There are no signs of life yet in that second bed.

There seems to be some argument on the proper method of harvesting asparagus. One camp argues that you simply snap off the asparagus spear with your bare hand.  The other group favors cutting the spear with a knife.

Actually, both methods are correct. In a small home garden, simply breaking the spear off at the soil line works just fine. The small stub left behind usually dries up and disappears.

Farmers who grow asparagus to sell, always use a knife of some sort.  The most common tool used resembles a dandelion weeder.  The knife is used to carefully cut the spear just below the soil line.

If you opt for the knife method, be careful not to cut too deeply, as there is a chance you will damage nearby buds.  It is these buds from which the asparagus spear grows.

The ideal time  to cut an asparagus spear is when it reaches about 6 to 8 inches or so in length.

It is always a good idea to cut all growth from the asparagus bed once you start harvesting.  If a spear is left to grow, the Asparagus Beetle will lay eggs on it.  These beetles hatch and grow very quickly and can do a lot of damage to tender young asparagus spears later in the season.

Whatever you do, don’t be tempted to cut off the tip of the spear and leave the remaining stalk still attached to the root.

Keep harvesting asparagus until the spears start to get smaller, the diameter of a pencil or so.  Then let them grow from that point so they can replenish their roots for next year’s crop.

Now, here is a box of asparagus we harvested this week.

Box of asparagus

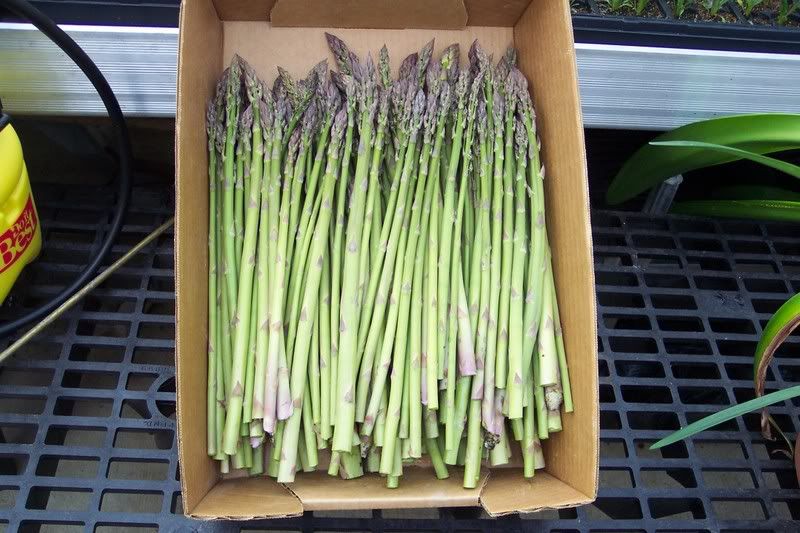
They are really too long for the entire spear to be usable. The base of the spears are tough and stringy.  To correct this problem, simply grab the asparagus near the bottom 1/3 and break it off.  The spear will break just above the stringy part, so there is no guessing on where to cut it. Toss the lower tough part into your compost bin.

The fact that you can harvest a crop from your garden so early in the spring makes this one of my favorite vegetables to grow.

Bob

Powered by WordPress