The Yellow Farmhouse Garden

June 21, 2019

Using agricultural paper mulch in the garden

Filed under: Mulch,Planting,Weeds — Tags: , , — bob @ 2:57 pm

Through the years I’ve used a lot of different kinds of mulch ranging from natural materials like straw or grass to man made materials such as plastic sheeting. The plastic I’ve tried has been in all the colors of the rainbow plus some that aren’t.

They’ve all claimed to have an advantage over plain black plastic. The color red was supposed to enhance tomato production. Light reflecting off of silver was supposed to confuse insect pests and on and on. Maybe there was a small incremental advantage they provided that could be seen over acres of crop, but in the garden I could never detect any.

One thing they all have in common is that they physically suppress weeds by preventing growth or inhibiting seed germination. I’ve settled on run of the mill black plastic.

This year I’m experimenting with agricultural paper mulch. It’s been around for some time — maybe you’ve tried it.  I’ve never thought to use it until I started reading about the problems plastic products in general are causing. Some countries have even threatened to declare war over it. Then there’s the problem of micro-plastics showing up everywhere in the environment.

Paper mulch doesn’t have those kinds of drawbacks. One big advantage is, over the course of a growing season, it will slowly break down. Then when the growing season is over, it can be tilled into the soil saving a lot of work removing it.

There are biodegradable plastic sheet mulch products that farmers use but first generation materials leave behind undesirable by-products in the soil as they decompose. That’s the reason why many of these products are not approved for organic farming. The paper mulch I have has been found to be acceptable by an organic certifying agency.

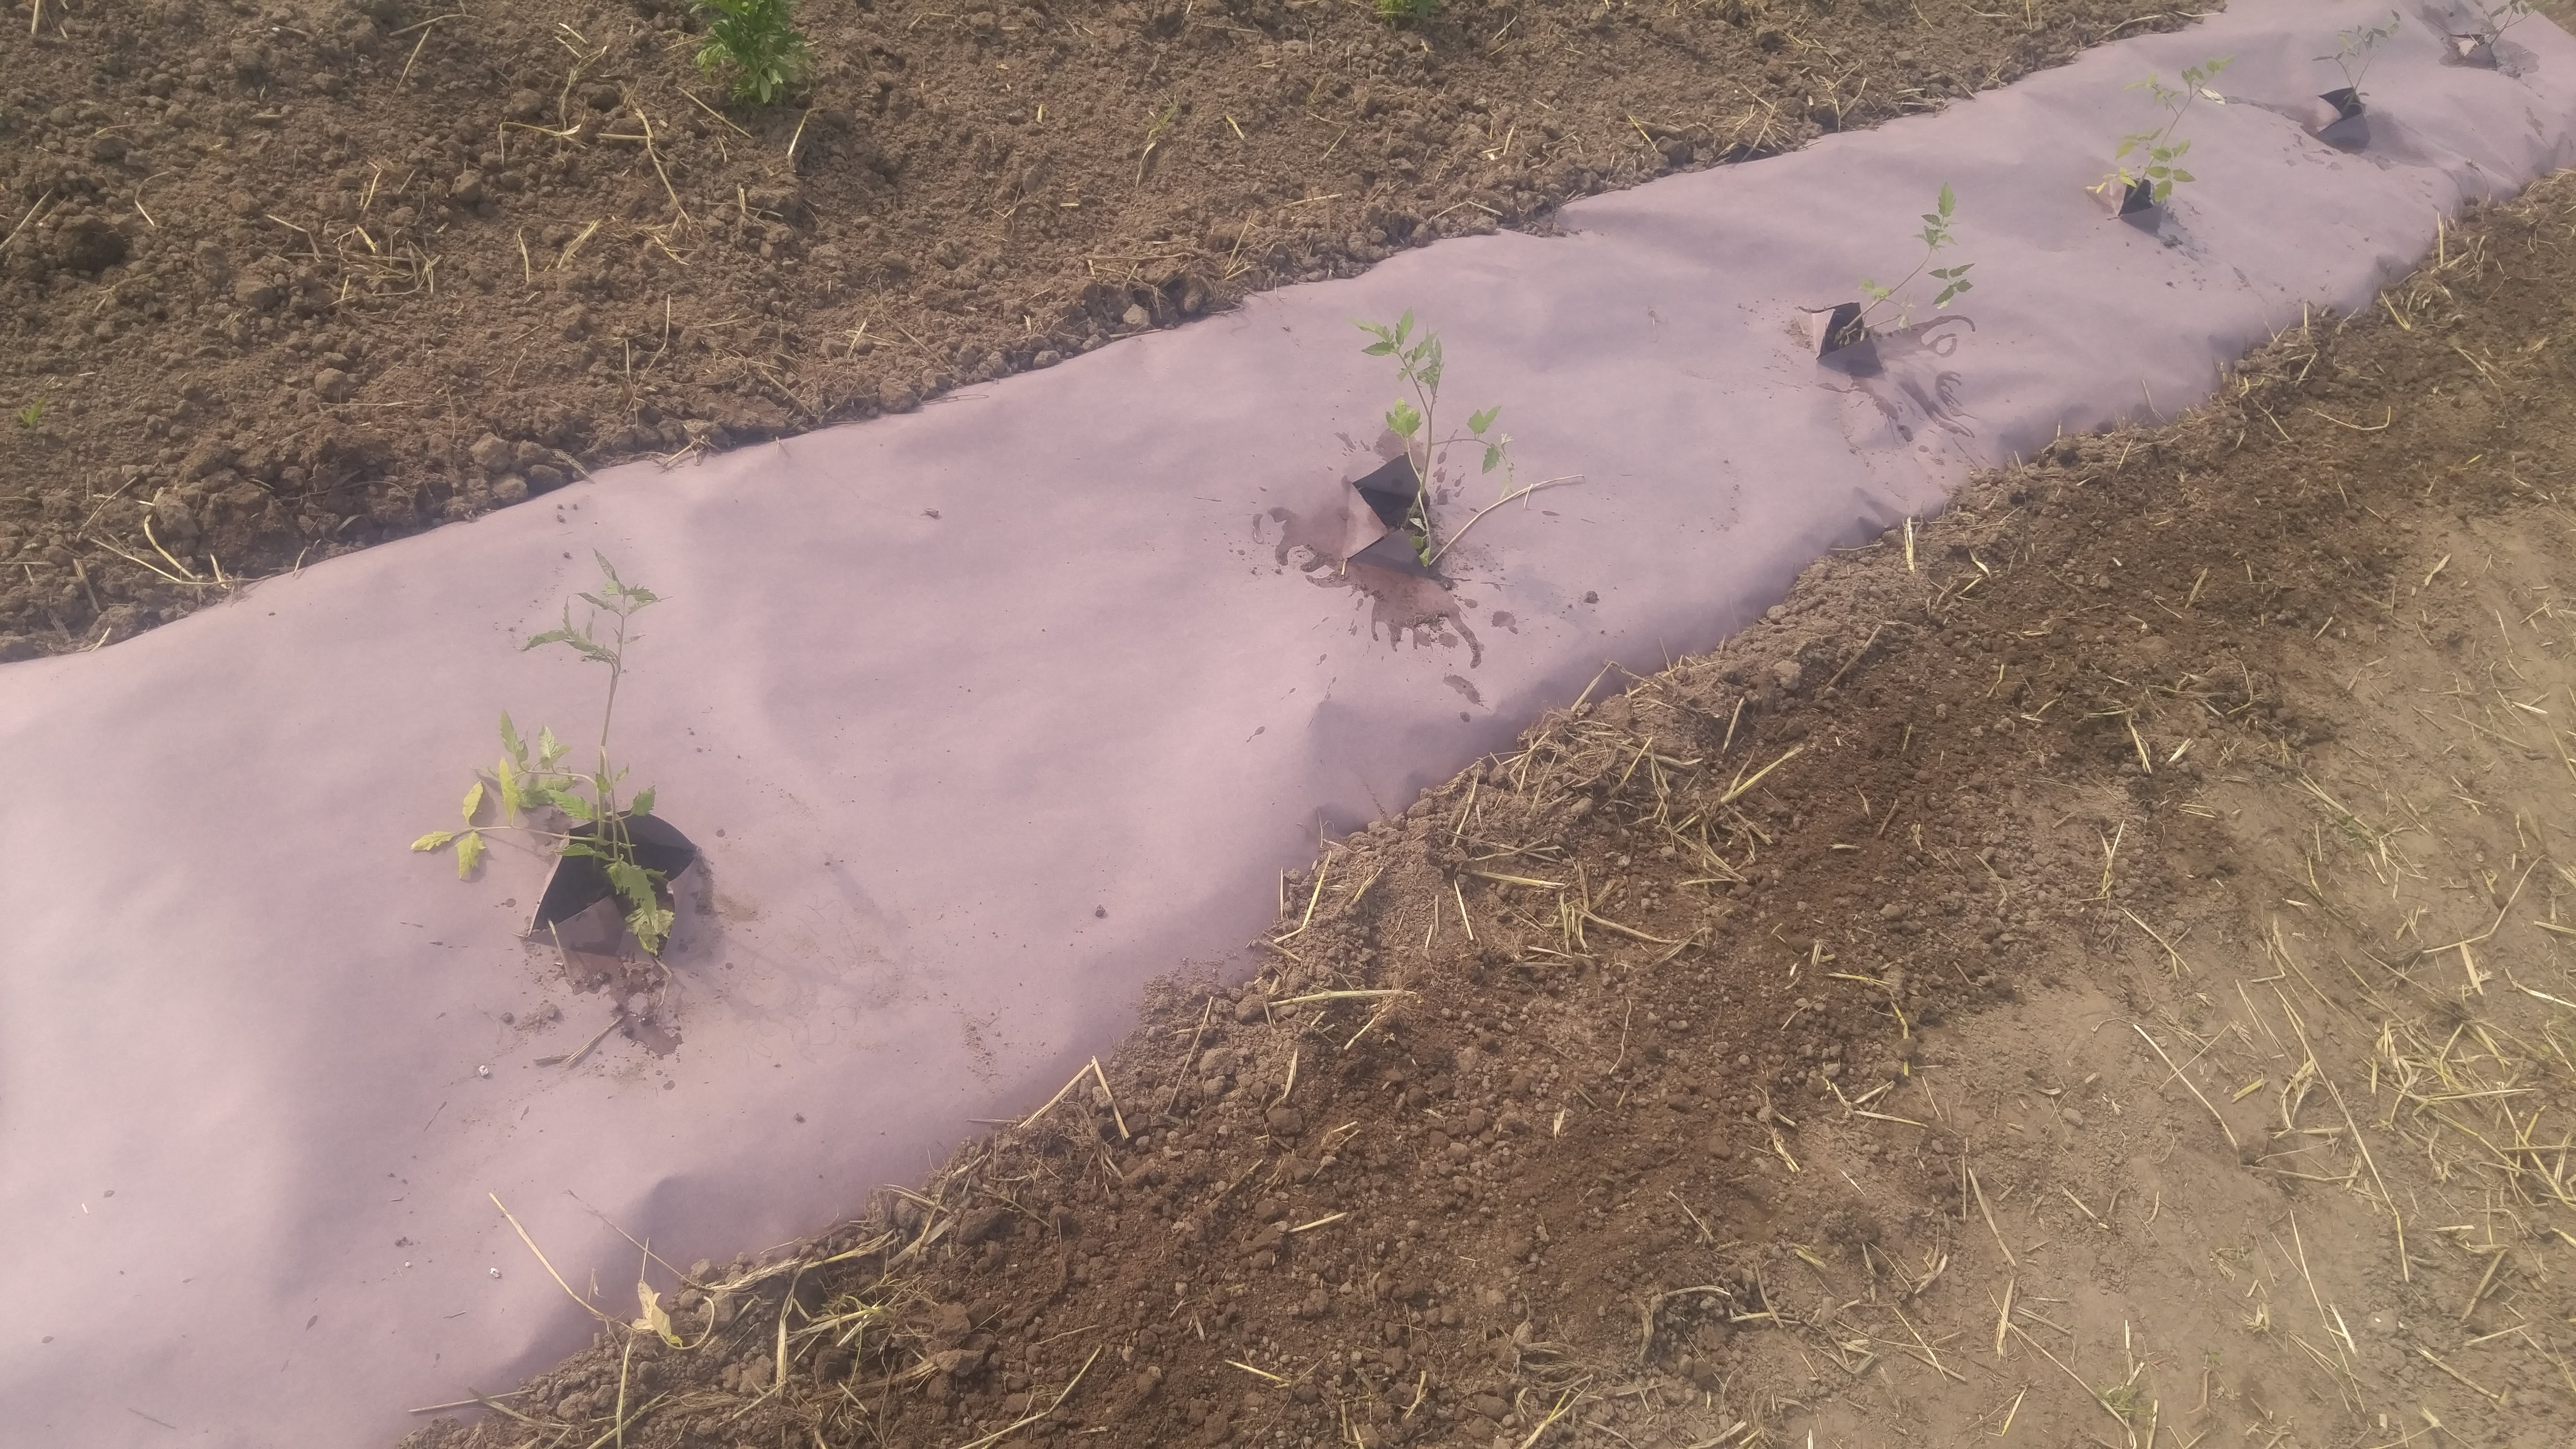
When I opened the box, I expected to see brown paper, sort of like a grocery bag but it has a faint purple hue to it. I don’t know if that is a result of the manufacturing process or if the color was added to differentiate if from other paper products.

Like all kinds of sheet mulch, it’s critical that the edges are firmly secured so the wind doesn’t get under it and tear it or blow it away. Some gardeners pin down their mulches with metal landscape pins. I like to make shallow trenches that accept the edges of the mulch then I’ll bury the edges with soil, sort of like what a farmer’s mulch laying machine would do.

Installing paper mulch is similar to plastic mulch.

Installing paper mulch is similar to plastic mulch.

You have to be a little careful when laying it down. With plastic if you start to veer off course, you can stretch it back in place. Paper does not stretch so any adjustments have to be made slowly over a distance. To minimize any placement issues, I stretch string as a guide when digging my trenches.

Paper mulch cuts easily with a pair of scissors or a utility knife.

Paper mulch cuts easily with a pair of scissors or a utility knife.

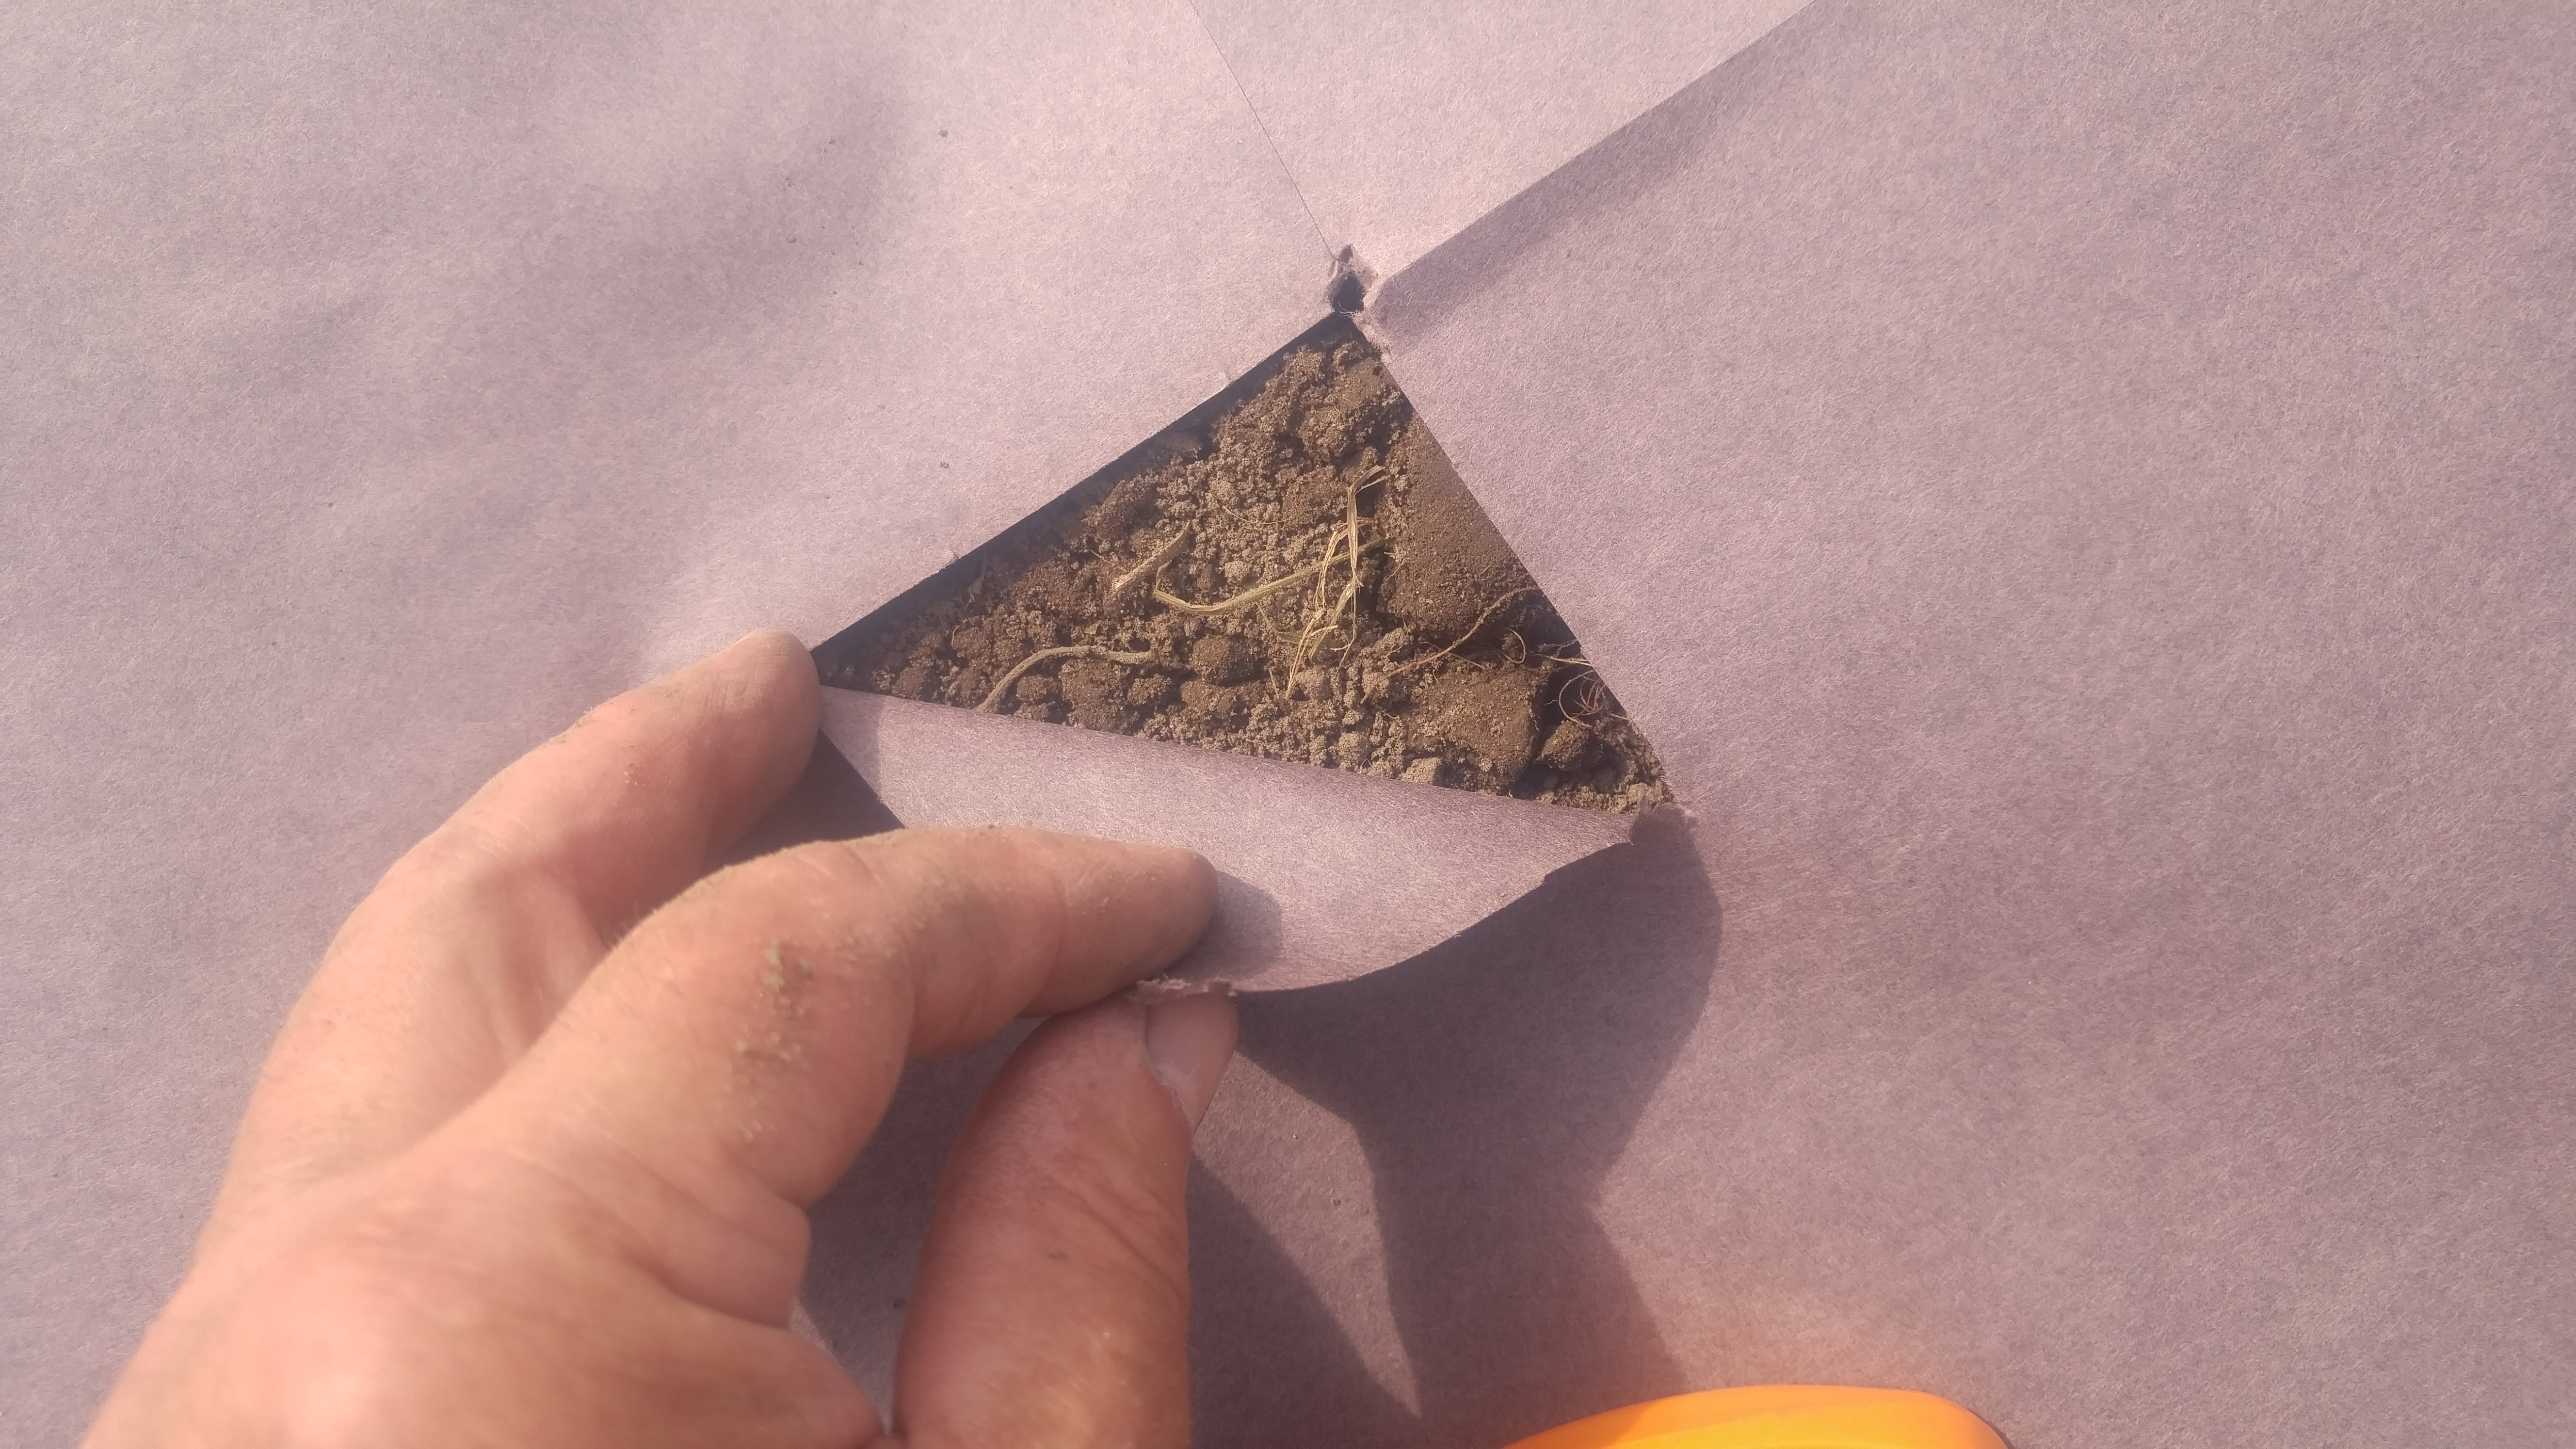
It’s important to have a smooth seed bed too so that the paper will lay flat and not have open voids between it and the soil surface.

To plant, I cut an X-shaped opening and fold back the edges of the cut. Then I carefully dig out some soil and place the plant in the hole and fold back the paper.

The paper makes an attractive looking mulch when it is new, I’m not sure how it will look after being exposed to garden conditions for several weeks.

This fall I’ll let you know how it performs over the course of a growing season and how well it tills in to the soil.

Bob

April 13, 2019

Florescent lights for starting plants

We’re growing many of our transplants under artificial light using primarily fluorescent tubes and they are doing quite well. It’s not as good as growing them in a greenhouse under natural sunlight of course.

When you stop and think about it, it’s really a wonder that florescent bulbs work as well as they do considering they have to produce those little packets of energy called photos in sufficient numbers to grow a plant. The plant uses that photon energy and builds itself right out of thin air using carbon dioxide with help from water and minerals in the soil.

Plants can gather enough photons only when the bulbs are close enough to the plant. Some beginning gardeners make the mistake of trying to grow seedlings under what looks to them to be bright light but is not for the plant. As a result the seedling start to show symptoms of light deprivation such as stretching toward the light source, abnormal color and general overall weakness.

We have our florescent tubes set up so that they are around three or four inches from the top of the plants, not more than six inches for sure. Since florescent bulbs give off so little heat, setting them that close is no problem. You wouldn’t want to do that with incandescent bulbs.

It’s  very important to start out with clean bulbs. Just a little dust collecting on them will reduce the amount light of light reaching the plants enough to weaken them. So make sure you clean your tubes, and the reflector of your tube fixture, for optimum results.

I keep my light bulbs no further than 4 or 5 inches from the seedlings. The gray on the bulbs in this photo is just a glitch from the camera.

I keep my light bulbs no further than 4 or 5 inches from the seedlings. The gray on the bulbs in this photo is just a glitch from the camera.

After a few seasons of growing seedlings under florescent bulbs you may notice you just can’t seem to grow them as well as you used to. It’s nothing that you are doing differently, it’s the bulbs themselves that are at fault. Florescent bulbs have a limited lifespan usually rated by the number of hours in use and that can be in the tens of thousands of hours. In reality however, bulbs will begin fading well before their rated life span, maybe even after just a few thousand hours. You won’t see it with your bare eyes but your plants will sure know the difference. Florescent tubes are on their way out long before the familiar gray deposits show up inside the glass.

A good policy under typical growing conditions would be to change out bulbs every three years. That way you’ll be sure your plants are getting off to a good start.

Bob

May 15, 2018

Planting almost no-till potatoes

This year I’ve decided to try a minor experiment with my potatoes. I guess you might call it a kind of no-till planting.

There are a couple of reasons I thought it might work well. First, the spot where they’re going was recently an area where some of my older chickens were penned in. I purposely kept them confined to a relatively small area to help clear it from weeds. They did a great job eliminating all of the existing weeds and keeping new ones from getting a foothold. Chickens enjoy grazing on fresh green plants and those wild greens provide plenty of vitamins.

Even though they are small, chickens can disturb a lot of soil in a short period of time. That makes them destructive if they get loose into a flower garden or other valuable spot and start scratching. Believe me, I had plenty of experience shooing chickens out of  flower gardens. It’s that relentless scratching that makes them such good helpers in the garden before planting time.

The area where my no-till potatoes are going there were no visible weeds. Under the surface however, there were thousands of recently germinated seedlings ready to pop up into the sunlight. Instead of using my rototiller, I used my sharpened swan hoe to skim along top half inch or so. I was able to cut off the weed seedlings before they had a chance to get started.

The theory is that while roto-tilling will destroy young weeds, at the same time it also drags up new seeds to the soil surface where they will germinate and grow. Shallow hoeing will kill weeds but not drag up new seeds. That Sounds like a good idea but there are plenty of dormant weed seeds waiting to take the place of their lost cousins. But over time, if done consistently, you can eventually reduce the number of viable seeds.

Back to my potato patch.

The second reason why I feel my quasi-no-till will work is because the soil is a sandy loam that really doesn’t need tilling to provide a good seed bed. If it was a finer textured soil with more clay content, I would probably not plant them without tilling.

Instead of using a trowel or shovel to dig the planing holes, I got out my two-handled post hole digger. That way I was able stand straight up to do the digging and I got a great upper body workout to boot.

Marking the rows with a hoe first made digging the holes go faster.

Marking the rows with a hoe first made digging the holes go faster.

The holes are plus or minus a foot apart with the rows around 28 inches apart.  At that planting density, the potato plants should eventually grow together enough to shade the soil surface keeping it cool and shading out weed seedlings.

I know I’ll have to keep up with my hoeing through the season, “no-till” doesn’t mean “no-work”. I’ve seen many inexperienced gardeners learn that the hard way. Real no-till involves the use of herbicides to control weeds but I’ve never used herbicides in my vegetable garden and plan to keep it that way.

While hoeing will be my main method of weed control, I’ll mulch what I can.

Bob

April 15, 2018

Spring planted garlic

Filed under: Herbs,Planting,Vegetables — Tags: , , , , — bob @ 8:48 am

Garlic is normally planted in the fall. Planting at that time of the year allows the garlic bulb to be exposed to several weeks of cold temperatures which stimulates bulb production. Missing the fall date can be disappointing, it means waiting an entire year before planting a crop.

If you are the type of person who doesn’t mind experimenting a bit, spring planting may be a option. Bulbs grown from spring planted garlic are significantly smaller which is why it is not recommended. Farmers would never be able to make a profit with an undersized crop, but in a garden it is worth having some fun with.

The other thing with spring planted garlic is finding bulbs to plant since most seed companies ship their garlic in the fall. One solution is to plant garlic from the supermarket produce department. You’ll never know what variety you’ll be getting but look at it this way, someone had a good enough crop with them to grow enough to sell.

Even though spring planted bulbs will be smaller, that doesn’t mean they will not be usable. You’ve probably eaten green onions before, you can eat green garlic too. If you’ve never tried fresh green garlic right from the garden, you’re in for a treat. The garlic taste is quite unexpected when your taste buds are expecting an onion flavor.

Don’t let them get too mature though. Green onions or scallions that swell up at the root end as they get older are still quite usable. Green garlic at that stage will start to develop the separations that eventually become cloves. When that happens tough membranes form that eventually become the papery wrappings over each clove that you see in full sized garlic. Those membranes make the young garlic too chewy to enjoy eating. At that point you just let them grow.

This is about the smallest size clove I would plant in the spring.

This is about the smallest size clove I would plant in the spring.

Since your spring planted garlic is late, you’ll have to give it every advantage to make growth. The first important thing to remember is garlic hates to be planted on it’s side. It’s critical that you plant the garlic clove with the bottom pointing down, don’t just toss it into a hole otherwise you’ll reduce the size of the mature bulb even more.

In your richest area of your garden, dig your planting hole so that top of the clove is covered by about two inches of soil. Plant the cloves between 3 and six inches apart; the closer spacing for green garlic, the more distant for garlic bulbs.

Early and season long weed control is essential, garlic just doesn’t compete well with weeds. Kill those weeds while they’re still little and keep it up all through the season. Make sure the soil is kept evenly moist but not soaking wet. The object is to try to encourage the garlic to grow as much as it can early in the season so that it will have plenty of green leaf area for photosynthesis.

If you’re going to do this thing, do it now — don’t wait until May. Garlic needs as much cool soil as you can provide during the early stages of growth.

With some care and persistence, you’ll end up with a culinary conversation piece that will surprise your garlic loving friends.

Bob

Bob

April 27, 2017

Planting strawberries

Filed under: Fruit,Planting — bob @ 10:24 am

Our strawberry plants were delivered this past weekend, I got them into the ground as soon as I could. After a long ride through the postal system, they were glad to be tucked into our new strawberry bed.

Beginning gardeners may not know that nearly all strawberries are grown from not from seed but from transplants. Strawberry plants reproduce naturally by sending out runners that form plantlets called “daughter plants” that quickly take root. Those new daughter plants themselves will send out more shoots and produce even more daughter plants. Eventually you end up with a dense mat of strawberry plants.

Strawberries should be planted in a well-prepared bed, ideally one that was cleared and tilled at least a year in advance. That will eliminate perennial weeds that will choke out your strawberries before they have a chance to get established. It also will greatly reduce the number of root damaging insects like grubs and wire worms. My new bed is in an area that has been part of the vegetable garden for several years now. I’ve also let the chickens run in this area during the off season. They’ve really kept that spot clean.

In a perfect world, we would plant the strawberries about 18 – 24 inches apart with the rows about two to three feet apart. My row spacing was a bit closer than that because I had more plants than I had room.

You can think of the plants as having three basic parts: the leaves; the crown, which is the center, bulky part; and the roots. The leaves grow from the top of the crow while the roots grow from the bottom. It’s very important to plant at the proper depth. The soil should just cover the roots without burying the crown. That is how a new daughter plant grows naturally. On the other hand, no roots should be sticking up above the soil line exposed to the air. It’s a matter of about a half an inch between too deep and not deep enough. Make sure there is plenty of room in the planting hole so that the roots are straight down and not curled up at the bottom.

At first glance strawberry plants look like all roots. The crown and leaves are less visible at this stage.

At first glance strawberry plants look like all roots. The crown and leaves are less visible at this stage.

Once your newly planted strawberries establish themselves, they will begin to produce runners and daughter plants. You can shuffle the daughter plants around to a more organized configuration to help maintain rows. That will make it easier to weed and pick later on. Or just let them take root wherever they want.

Pluck the flowers off as they appear, that will keep the plants from wasting its energy producing fruit instead of stronger daughter plants. All those new daughter plants will produce your strawberry crop next year. So the stronger they are, the better your harvest will be.

Keep your bed free from weeds and well watered throughout the growing season. Later, at the end of the season they will need to be mulched. We’ll discuss mulching when the time comes.

Bob

Older Posts »

Powered by WordPress