The Yellow Farmhouse Garden

July 11, 2019

Adding dye to your sprayer mix to help you see where you sprayed

Filed under: Equipment,Pesticides,Weeds — Tags: , , — bob @ 8:55 am

So far it’s been a great growing season for trees, shrubs and perennial plants. Maybe you’ve noticed how much growth has been made so far this year making the landscape look so much more green. I bet, a hundred years from now, when people are looking at tree rings, they’ll notice how large the growth ring is from 2019.

Along with everything else, problem plants such as poison ivy have also been going great guns. It’s a good idea to knock back these plants before they get out of control. The most efficient way is to use herbicide sprays.

The most popular herbicides, such as Round-up and others, are the “non-selective” type meaning they will kill just about any and all plants they touch. When applying these herbicides, it’s very easy to overspray and accidentally kill neighboring desirable plants along with the weed you’re trying to get rid of. To minimize that problem, farmers, landscapers and other plant professionals use a marker dye added to their spray mix to help them see where they sprayed. Generally those dyes wash off in the rain or otherwise dissipate pretty quickly after drying. Those kinds of marker or indicator dyes are available at hardware stores and farm supply stores.

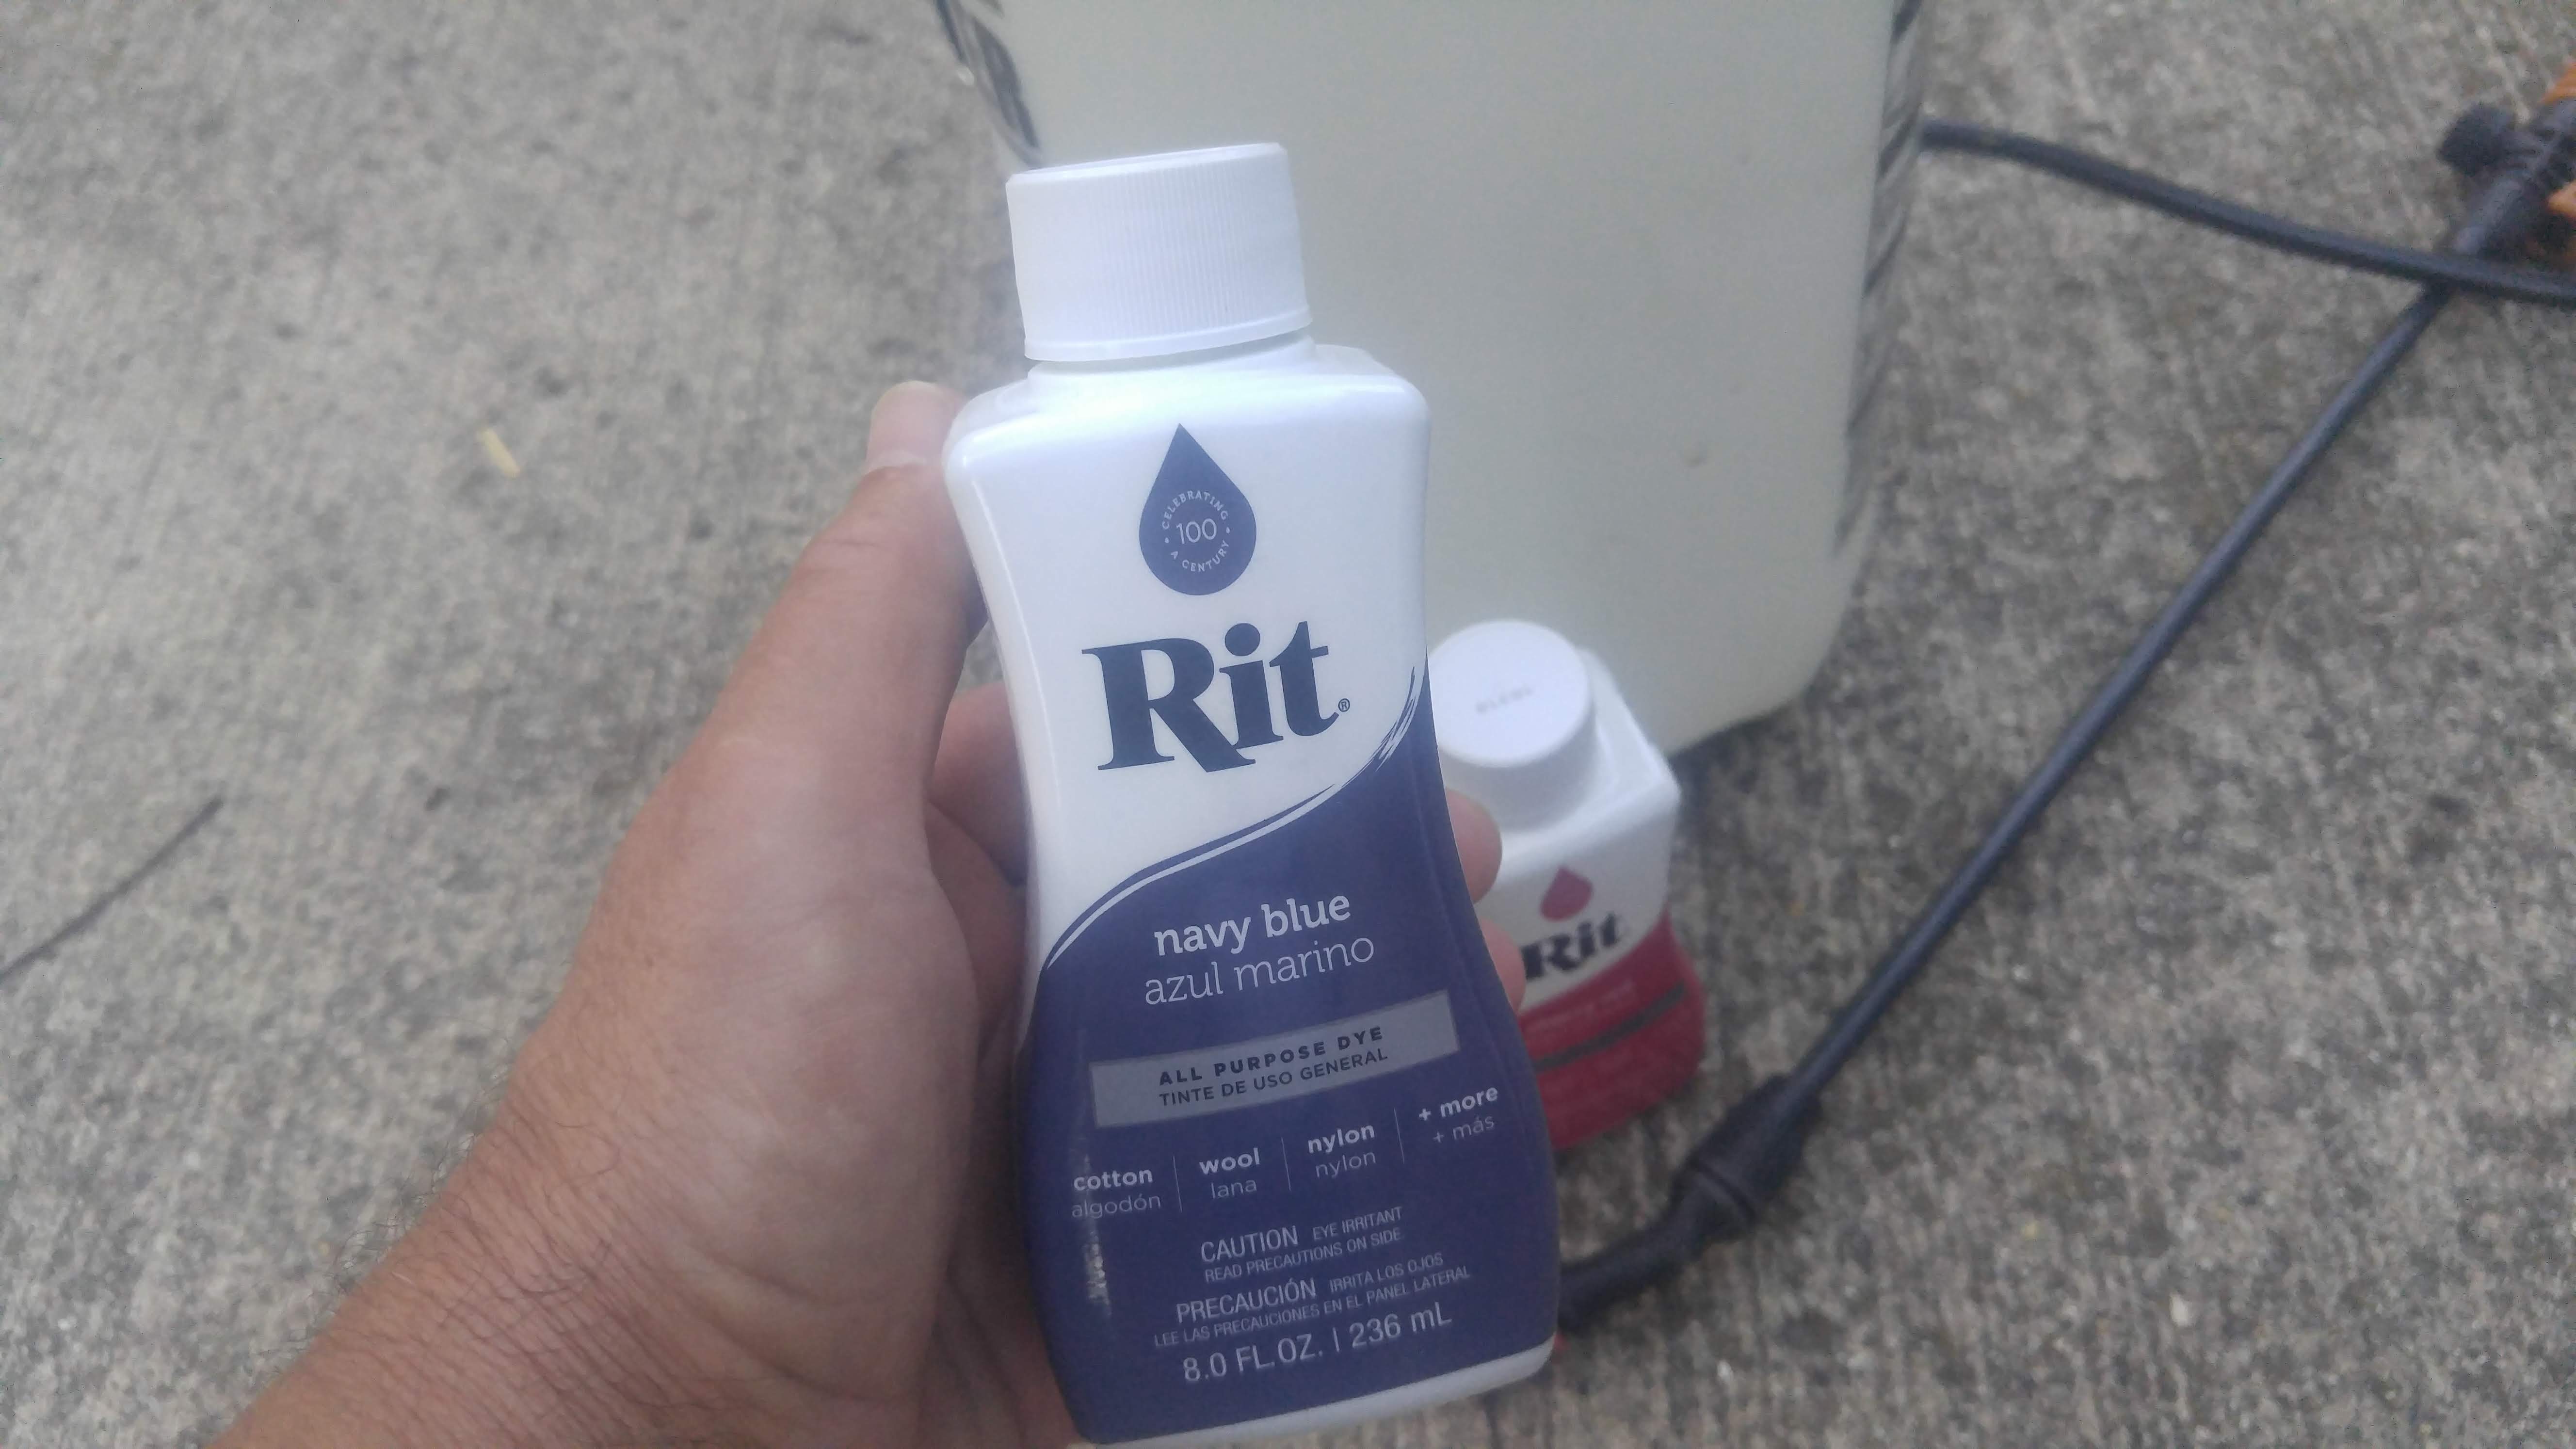
An excellent alternative to marker dyes for homeowners is Rit all-purpose fabric dye. Rit actually dyes the plant leaves, leaving the color visible for quite some time. That is a great advantage if you don’t get all of your spraying done and have to return later to finish the job.

Blue is the traditional color for dying spray.

Liquid Rit dye is much easier to use than powered.

Traditionally, blue is the color used for indicator dyes. This year I’m also trying out red to see how it works, mainly because it was on sale for half price. If it doesn’t work, maybe I’ll try tie dying some tee-shirts.

About one and one-third ounces of liquid Navy Blue Rit will dye a gallon of spray and provide enough color to produce a light-blue hue that will be noticeable on the plants even after drying.

An eight ounce bottle of liquid Rit runs around five bucks at craft stores.

Bob

April 28, 2016

Save downtime and money by servicing your hard-starting outdoor power tool

Filed under: Equipment — bob @ 7:18 am

Winter is the time when outdoor gardening stops and gardeners move indoors to get their power equipment ready for spring.

I took care of most of my equipment this winter, but not all. As the weeks went by, some things got pushed to the back of the storage shed. It’s like they went into hibernation and are just now waking up to see the light of day.

This week I dragged all my power tools outside to make sure they would start. All ran fine except one. It is powered by a two-cycle engine — sometimes called a two-stroke engine. You know, one of those that you have to mix oil into the gasoline. String trimmers, chainsaws, leaf blowers are some of the most common tools that use this type of engine.

A two-cycle outdoor tool that has lost its power or won’t start or is hard to start, probably has carbon build up on the exhaust port. And that’s exactly what happened to mine.

Two-cycle engines require unobstructed air flow to run properly. After many hours of use, carbon deposits inevitably  build up on the exhaust portion of the engine –especially if it is run at slow speeds — making it hard or impossible to start.

Fortunately, cleaning those carbon deposits are a doable project for someone with a little mechanical know-how. It’s a good project to try if you want to progress beyond blade sharpening or oil changing.

Here’s one way to do it.

For safety sake it’s always a good idea to get into the habit of disconnecting the spark plug wire whenever working on gasoline powered engines.

Remove the heat shield from the muffler.

Then un-bolt the muffler from the engine which will expose the exhaust port. You’ll be able to see the carbon caked onto the exhaust opening.


This is what a typical exhaust port looks like.

This is what a typical exhaust port looks like.

Slowly pull on the starter rope to bring the piston up to cover the port opening. That will keep loose particles from falling into the cylinder. Stray particles inside the cylinder will cause scoring of the piston and cylinder walls, then you’ll have a bigger problem to deal with than just carbon deposits.

Use a small piece of hardwood sharpened to a point– or a screwdriver if the carbon is really tough — to carefully scrape off the carbon. Don’t dig into the underlying metal and be extra careful not to scratch the piston!

Once you have the carbon loose, vacuum it up with your shop vac.

Remove carbon deposits from all muffler parts.

Remove carbon deposits from all muffler parts.

Check the muffler and other parts for carbon build up too before you reassemble everything.

If your exhaust system includes a screen, make sure it is clean.

If your exhaust system includes a screen, make sure it is clean.

The engine should start easily and will have more power. This is the first thing a repair shop will do when they get a two-stroke engine . So it makes sense to try this first before taking it into the repair shop. You’ll save money and be able to use your machine right away instead of waiting weeks for it to get repaired.

Bob


March 25, 2015

Building a grow light fixture for seedlings using recycled parts

Filed under: Equipment,Seed Starting — bob @ 4:16 pm

There was a small project that I had to get done this week. I needed to add another bank of lights in my seed starting area.

You would think that after so many years as a professional gardener my seed starting room would look like some kind of laboratory complete with stainless steel racks, electronic equipment and all other sorts of really cool stuff. A few years ago when I was starting many thousands of plants, that was pretty much the case. Now days, I’m gardening at a much smaller scale.

My seed starting area is probably much simpler than what the average serious garden has. My general rule for these types of things is to not buy anything fancy or brand new if I can make it myself without sacrificing functionality.

I have a a pair of three foot, single bulb fluorescent light fixtures that I bought for a couple of bucks at a garage sale last fall. My plan was to attach them together to make a single assembly that I can easily adjust up and down depending on the growth of the seedlings.

Florescent light fixtures from a garage sale.

Florescent light fixtures from a garage sale.

There were no florescent tubes when I got them. That actually was a good thing since, over time, the amount of light  florescent bulbs produce dramatically diminishes over time. I didn’t have to dispose of any used bulbs which saved me some hassle. The bad thing was that I only had the seller’s word for it that the fixtures worked.

The first thing I did was open up the case to inspect the innards to be sure there were no wires shorting that could be an electrical hazard — they both looked sound.

The cover protecting the fixture wiring just snaps off and on.

The cover protecting the fixture wiring just snaps off and on.

Next I tested them with my new bulbs and sure enough, they lit up nice and bright.

The bulbs lit fast without flickering.

The bulbs lit fast without flickering.

Fixtures like these usually have pre-drilled holes that are used for mounting onto various surfaces, these were no different. I had some metal drawer brackets in my inventory of useful stuff that I saved from an old dresser. They were the perfect size for joining the two fixtures together.

I used self-tapping sheet metal screws to attach the brackets to the light fixtures.

Self tapping screws means no drilling necessary.

Self tapping screws means no drilling necessary.

I bent pieces of heavy-duty fencing wire to make hangers for each end of the fixture assembly.

Heavy wire bent into shape makes a fine hanger.

Heavy wire bent into shape makes a fine hanger.

The assembly is hanging by leftover ceiling light chain from a section of shelving that someone gave to me.

A section of used plastic shelving hold the light fixture assembly and seedling trays.

A section of used plastic shelving hold the light fixture assembly and seedling trays.

Even if you don’t have parts like I had laying around, recycling center that sell building materials often have fixtures, shelves and other parts for sale at very reasonable prices. I noticed while visiting Recycle Ann Arbor today that they had five nearly new florescent fixtures in stock.

Florescent light fixtures still in their boxes at Recycle Ann Arbor

Florescent light fixtures still in their boxes at Recycle Ann Arbor

For a very modest investment in cash and time I ended up with an additional seedling grow light.

Bob


June 4, 2014

Restoring a vintage Mantis tiller

Filed under: Equipment — bob @ 2:41 pm

My big project this week is restoring a vintage 1983 Mantis tiller. I picked it up at an estate auction for what I hope turns out to be a reasonable price. This is the kind of job I like to do during the winter when things are quiet in the garden but sometimes the timing doesn’t always work out.

Even though I was able to inspect this old piece of power equipment before I bought it, you never know for sure if it is worth taking a chance on. The pressure of an auction adds another dimension to the decision making process.

I’ve had a fair amount of experience repairing small engine equipment so, even though this tiller didn’t run at the time I bought it, I still was pretty confident I could bring it back from the brink of death.

It looked pretty rough on the outside. There was oil-soaked dirt caked all over the engine. The tines were wrapped almost completely in tough grass and weed stems. The handles and other metal components were beginning to rust.

On other hand, all the parts were there and the controls worked smoothly. The engine turned over and felt like it had the right amount of compression. All those positive things out weighed the negatives.

The first thing I did when I got it home was cut away all the tangled debris from the tines. Then cleaned the dirt and oil off of the the rest of the machine.

I took the cover off of the gearbox and it’s inner workings looked in great shape. The spark plug was pretty old and needed to be changed.

This Mantis has a two-stroke engine. The exhaust ports on two-strokes are prone to plugging up with carbon deposits. Fortunately there were not a whole lot of deposits to contend with.

A rough running or hard to start two-stroke engine can be caused by carbon build up on the exhaust port. Remove the muffler to expose the exhaust port.

A rough running or hard to start two-stroke engine can be caused by carbon build up on the exhaust port. Remove the muffler to expose the exhaust port for inspection.

No fuel was getting to the engine which indicated a carburetor problem. I had to weigh the pros and cons about rebuilding the carburetor compared to buying a new one. Since I didn’t know the history of the machine I ended up getting a new carburetor.

I’ve been lucky so far that all of the parts I needed are still available, that’s not always the case with these older machines.

In the next day or so I should have everything put back together and ready to go.

Bob

April 11, 2014

Use a heat mat for quick seed germination

Filed under: Equipment,Greenhouse,Seeds — bob @ 10:11 am

For many years I started seeds without using a seedling heat mat.There never seemed to be any problems doing it that way as long as I was able to find a warm spot for my seed trays. Those were the days when the tops of refrigerators radiated heat and were nice and warm. That was the best place to germinate small amounts of seeds because the constant heat warmed up the seed starting containers to the ideal temperature. Small heat mats for home use were not readily available back then.

It wasn’t until I worked in a large private greenhouse that I really found out the advantages to using bottom heat. I needed to grow thousands of flower and vegetable plants from seed. Time was, and still is, a valuable commodity, I couldn’t afford to wait for seeds to sprout.

Seeds I grew on heat mats seemed to jump up through the soil surface compared to their unheated brethren — germination percentage went up too. After the first transplant growing season, I invested in a few large commercial heat mats.

These days, nearly all garden centers sell small heat mats. They are usually preset at a specific temperature and are not adjustable, unlike the commercial mats.

Heat mats will last for years  if you use them properly and store them carefully.

Heat mats will last for years if you use them properly and store them carefully.

The small mats work just fine for small amounts of seeds. By small amounts, I mean you can still germinate enough seeds to grow hundreds of plants. That’s more than enough for an average home garden.

If you are even a little bit serious about growing plants from seed, a seedling heat mat is an essential investment, especially now that refrigerators aren’t warm anymore.

Bob

Older Posts »

Powered by WordPress