The Yellow Farmhouse Garden

April 22, 2015

Pruning apple trees: five cuts you can make even if you’ve never pruned before

Filed under: Fruit,Trees — bob @ 9:26 am

Although you can prune apple trees just about any time of the year, most apple growers agree spring is the best time to do it. You may have seen professional orchardists out pruning trees as early as February but that is only because they have so many trees that they need the extra time to get them all pruned before the growing season starts.

Pruning and shaping apples trees takes some knowledge and experience to get it right but there are a few cuts you can be sure of even if you’ve never pruned an apple tree before.

Before pruning remember to make the cuts near the junction of the twig or branch and the main branch or trunk. Don’t leave a long stub. Conversely, don’t cut into the trunk or main branch, that makes it difficult for the tree to heal. Try to leave just a small “collar” to allow for proper healing.

You’ll need two basic tools. Use a sharp pair of pruning shears for twigs and small branches. Loppers resemble over-sized pruning shears. They are much more sturdy than shears, have longer handles and are used for for cutting larger branches.


By-pass type pruners (left) make the cleanest cuts. Anvil type pruners are cheaper to buy but don't cut as well.

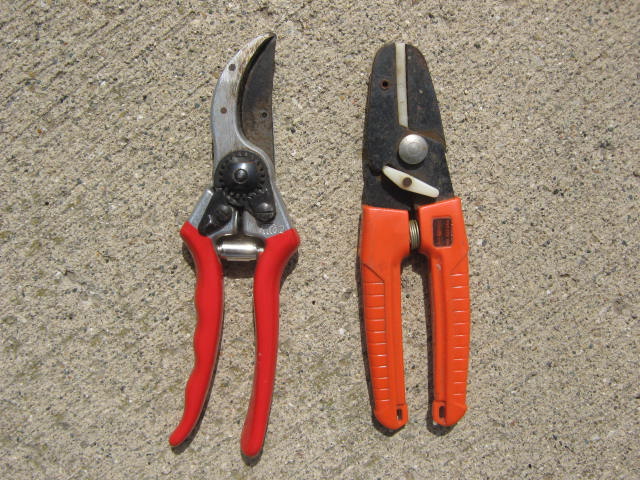
By-pass type pruners (left) make the cleanest cuts. Anvil type pruners are cheaper to buy but don’t cut as well.

Here’s five basic cuts to make when pruning apple trees:

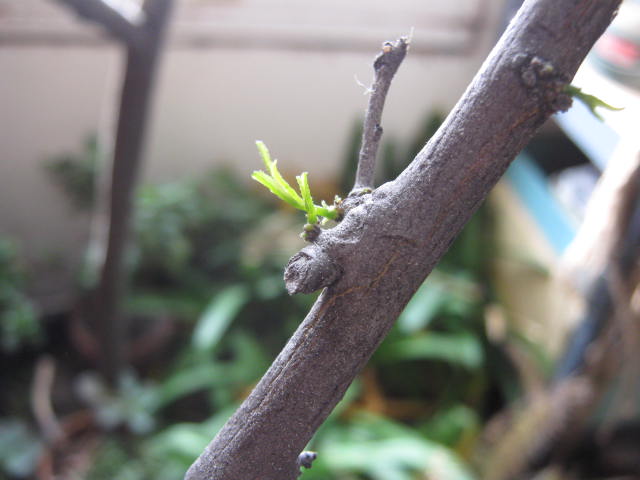
1) Cut off all dead twigs and branches. The spot where they attach to the tree provides a entry point for disease and other pests. Once a branch dies, the tree will try to heal around the dead branch. Unless the branch is cut off or falls off naturally, healing will never be complete.

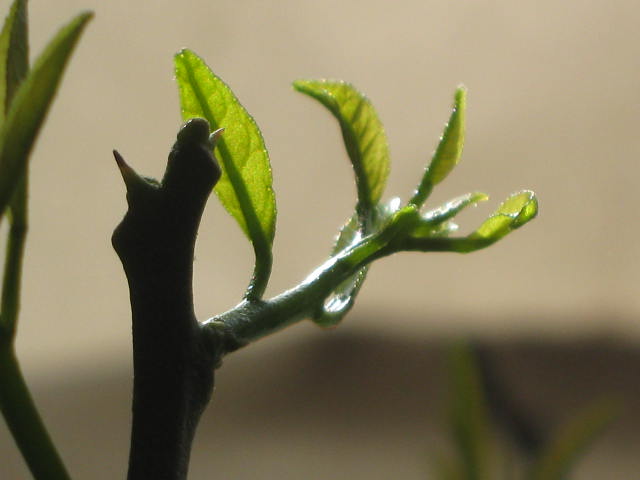
2) Prune away “suckers”. They are those thin shoots that grow up around the base of the tree. They don’t contribute anything to the tree and make their growth at the expense of the rest of the tree.

3) Help increase light penetration and improve air circulation through the tree by removing all “water-sprouts”. Those are thin shoots that grow straight up from the main branches. They don’t produce fruit and will grow larger each year eventually distorting the tree.

4) If two branches are rubbing against one another, remove the weakest one. Rubbing damages bark leaving a wound for disease organisms to enter the tree.

5) This one will take a little more thought. Prune away weak branches that are shaded by more vigorous branches. Even though they may produce fruit, it won’t be the quality and volume produced by stronger branches. If you are fortunate enough to have inherited a mature apple that has been properly pruned through the years, it’s easier to tell which are the weaker branches.

There is much more to proper apple tree pruning but these five cuts will go a long way to improving the health of your tree and building your confidence for more sophisticated pruning.

Bob

January 8, 2015

Lemon tree recovers from freezing in the fall

Filed under: Fruit,Trees,Weather — bob @ 2:20 pm

Sometimes gardeners are given plants that others can’t use or take care of but they just can’t bare to throw out. That happened to me this past summer when someone gave me a four foot tall lemon tree. It was in mediocre condition, a little weak and run down and needed some extra attention.

I re-potted it and applied slow release fertilizer pellets. Once or twice a week it also got a dose of manure tea solution.  It took me the rest of the summer to nurse it back to reasonable health.  And it actually looked pretty good going into the fall.

I always like to keep my citrus trees out as long as possible in the fall. It seems like a bit of a chill tends to make them a little more hardy. I don’t worry about the trees  if it gets down below freezing. They seem to do well even when it briefly dips into the upper twenties at night.

One evening this fall I got caught stretching the season out too much. The overnight temperatures were predicted to be around 28°F so I moved the trees to a sheltered area near the garage, tossed a light frost cloth over the top of them and let them stay out that night.

The actual temperatures were almost ten degrees colder than predicted. The oranges looked a little droopy from the cold but I was pretty sure they would pull through. I’ve seen them handle some pretty cold temperatures after a power outage. The new lemon tree however, lost nearly all of its leaves. A large percentage had already fallen off of the tree and were laying on the frosted ground — it did not look good at all.

That day I moved them all into a semi-heated area in my garage for storage. The temperature stays in the upper 40′s and the trees get a few hours of winter sunlight from south facing windows.


Leaf and twig buds grow at the node where the old leaves were.

Leaf and twig buds grow at the node where the old leaves were.

A couple of days after Christmas I noticed some tiny green pointed buds here and there on the lemon tree — it was still alive and wanting to grow leaves! A few days later, buds were emerging from branches all over the tree.


This new twig is almost two inches long.

This new twig is almost two inches long.

This week, the buds are still growing and developing into new leaves and twigs.

I’m fairly optimistic that the lemon tree will completely recover but it’s not out of the woods yet, we still have plenty of winter left before spring arrives.

Bob


December 3, 2014

Protect fruit trees from meadow voles

Filed under: Fruit,Other Organisms — bob @ 11:43 am

After the first cold snap of the season, the fruit trees have gone dormant. For now, disease and insect pests have also gone dormant and won’t be bothering the trees until spring. That doesn’t mean the orchard is completely safe from pests.

There’s another kind of pest active out in the orchard during winter; meadow mice, or more accurately, meadow voles.

Voles look very much like mice and are about the same size. They act much like mice in their feeding habits and the way they gnaw on things.

During the winter when the ground is snow covered, voles build tunnels under the snow. The tunnels are built to help hide them from predators and to help keep them warm while they search for food. They travel through those tunnels over and over through the winter.

Meadow voles eat a wide variety of grasses, seeds and other kinds of plant material. Unfortunately, they sometimes develop a taste for the tender bark of young fruit trees, especially if the vole population is large and their other food sources become scarce.

I’ve lost a few fruit trees from voles through the years. One way to keep voles from damaging vulnerable trees is to install a physical barrier around the trees.

Installing a cylinder of wire mesh — hardware cloth — around each fruit tree, keeps voles from gnawing on the tender bark. It’s like having a miniature fence around each tree.

I use 18 inch wide hardware cloth and form it into thin cylinders about six to eight inches in diameter around each tree trunk. This gives the trees plenty of protection in case there is a lot of snow cover. The mesh size has to be one-half inch, less is even better, otherwise voles will crawl right through to get to the bark.

Chicken wire on left, hardware cloth on right.

Chicken wire on left, hardware cloth on right.

There’s a plastic tree-wrap rodent barrier on the market. It’s easier to install at first but needs to be removed each spring and re-installed each fall.  Even though it’s designed to expand, if left on, the plastic material will keep the bark from developing properly.

A hardware cloth cylinder can be left in place for a few years until the tree matures and has developed coarse bark that is less appetizing to vole.

Bob

Grow paw paw trees from seed

Filed under: Fruit,Seeds — bob @ 11:32 am

I’ve heard experts, farmers and others say for decades that paw paw is on the verge of becoming the next “in vogue” fruit. They may be finally right.

Since current paw paw varieties are so difficult to handle and are impossible to ship because of the soft fruit, only local paw paws are ever available.That makes them well positioned to become popular with locavores and other foodies.

Five years ago I planted eight seeds from a paw paw fruit and ended up with a half dozen seedlings happily growing in pots. Unfortunately, they were lost during a move and I never pursued starting any more. Since it takes five to seven years for a paw paw tree to begin producing,  by now, I probably would have had a small crop to pick this year.

Just this week, I was given a paw paw fruit. I’m inspired once again to save the seeds and start all over again with my future paw paw orchard.

Like most trees native to this area, paw paw seeds must be stratified before they will germinate. Stratification involves exposing seeds to cold temperature and adequate moisture.

In this case, paw paw seeds require 90 to 120 days at 32°F to 40°F while being kept moist. The vegetable crisper of a refrigerator is just the thing to meet those conditions. Just rinse off the seeds, and place them in some moist peat moss in a zip-lock storage bag. Toss the bag in the crisper and forget about it until spring. Don’t let them dry out or freeze, either one will kill the tiny paw paw tree embryo inside the seed.

Paw paw fruit

Paw paw fruit

Next spring plant the seeds into pots of good potting mix. If all goes well, the seeds will sprout in about two and a half to three weeks. Then re-pot as needed in order to give the new seedlings plenty of room to grow.

The most difficult part of the whole process may be finding a paw paw fruit in the first place.

Bob


August 28, 2014

Heirloom apple tree 14 year odyssey

Filed under: Fruit — bob @ 3:11 pm

Fourteen years ago I planted a ‘Lord’s Seedling’ apple tree, an heirloom variety. It transplanted well and made really great growth the first three years.

Then during the winter of the fourth year, disaster struck. Under the snow, near the base of the tree, mice chewed the bark all of the way around the trunk, girdling it.

That spring the tree leafed out normally. Somehow, it stayed green the entire season. It didn’t make any growth of course because the connection  between the roots and the top was severed.

I could have tried to repair the damage by grafting but I was very busy that spring and never got to it. I decided to just write it off.

The next spring, a few shoots sprang up from what was left of the roots. Most of the shoots were from the root-stock, the part of the tree on to which the Lord’s Seedling was grafted on to at the nursery. Those shoots would never produce a Lord’s Seedling apple because they have a different genetic background.

Looking closer, I noticed one tiny bud looked like it may have been above the point where the tree was grafted. That meant it could have been a Lord’s Seedling bud.

I removed all of the shoots from the rootstock except that one bud. I nursed that bud and later it grew into a vigorous shoot.

During the following years, that bud became a tree. I still had no idea if it was a Lord’s Seedling tree or just a tree grown from the rootstock.

Russeting is considered a defect in the commercial apple world. On Lord's Seedling apple  the gorgeous golden-brown russet is a part of it's normal appearance.

Russeting is considered a defect in the commercial apple world. On Lord’s Seedling apple the gorgeous golden-brown russet is a part of it’s normal appearance.

This year, the tree grew a full crop of apples and I was finally able to see what variety it really is. Low and behold, turns out it is a Lord’s Seedling tree after all.

I took an educated gamble on the tree and it took until now to finally pay off.

Bob

« Newer PostsOlder Posts »

Powered by WordPress