Even though the soil out in the garden is still very cold, we can still plant our garden — on paper that is.
There are several advantages to planning your garden on paper or on an app, before setting it out in the ground. The most obvious is you can get a good idea of how much planting material you need such as transplants, seeds or bulbs. And it is handy for calculating how many pounds of soil amendments you may need to add to the soil.
I was once one of those gardeners who never planned ahead very much. When it came to planting, I just picked out my favorite seeds and planted until it either looked like enough or I ran out of material to plant. I also didn’t pay much attention to which way the garden was facing. Most of the time I had plenty of square footage to use and I could afford some inefficiency. That, however, is not the way to get the most out of a space.
Not long ago, I had a discussion with a friend of mine about which direction garden rows should run.
Sometimes there’s no choice because of the shape of the garden. A long, narrow garden spot may mean the rows have to follow the long axis of the plot. In the past, I’ve had gardens that had an irregular shape so the rows ran in more than one direction because that was the most efficient use of that particular space.
What if you have a square or nearly square garden with one of the sides facing south, should the rows run north and south or east and west?
Imagine the position of the sun in the sky during the growing season. It appears to us to travel across the sky from east to west. As it moves through the sky, the angle of the rays of sunlight changes in relation to the stationary garden plants.
In an east to west configuration, much more sunlight will strike the south side of the plants than on any other side. In other words, the south side will receive more solar energy while the north side is shaded most of the day.
Rows planted north to south will receive sunlight more evenly. In the morning, the east side of the row receives sunlight. The plant is bathed in sunlight all day as the sun moves until late afternoon when the west side gets sunlight. So the plant receives sunlight on three sides instead of just one.
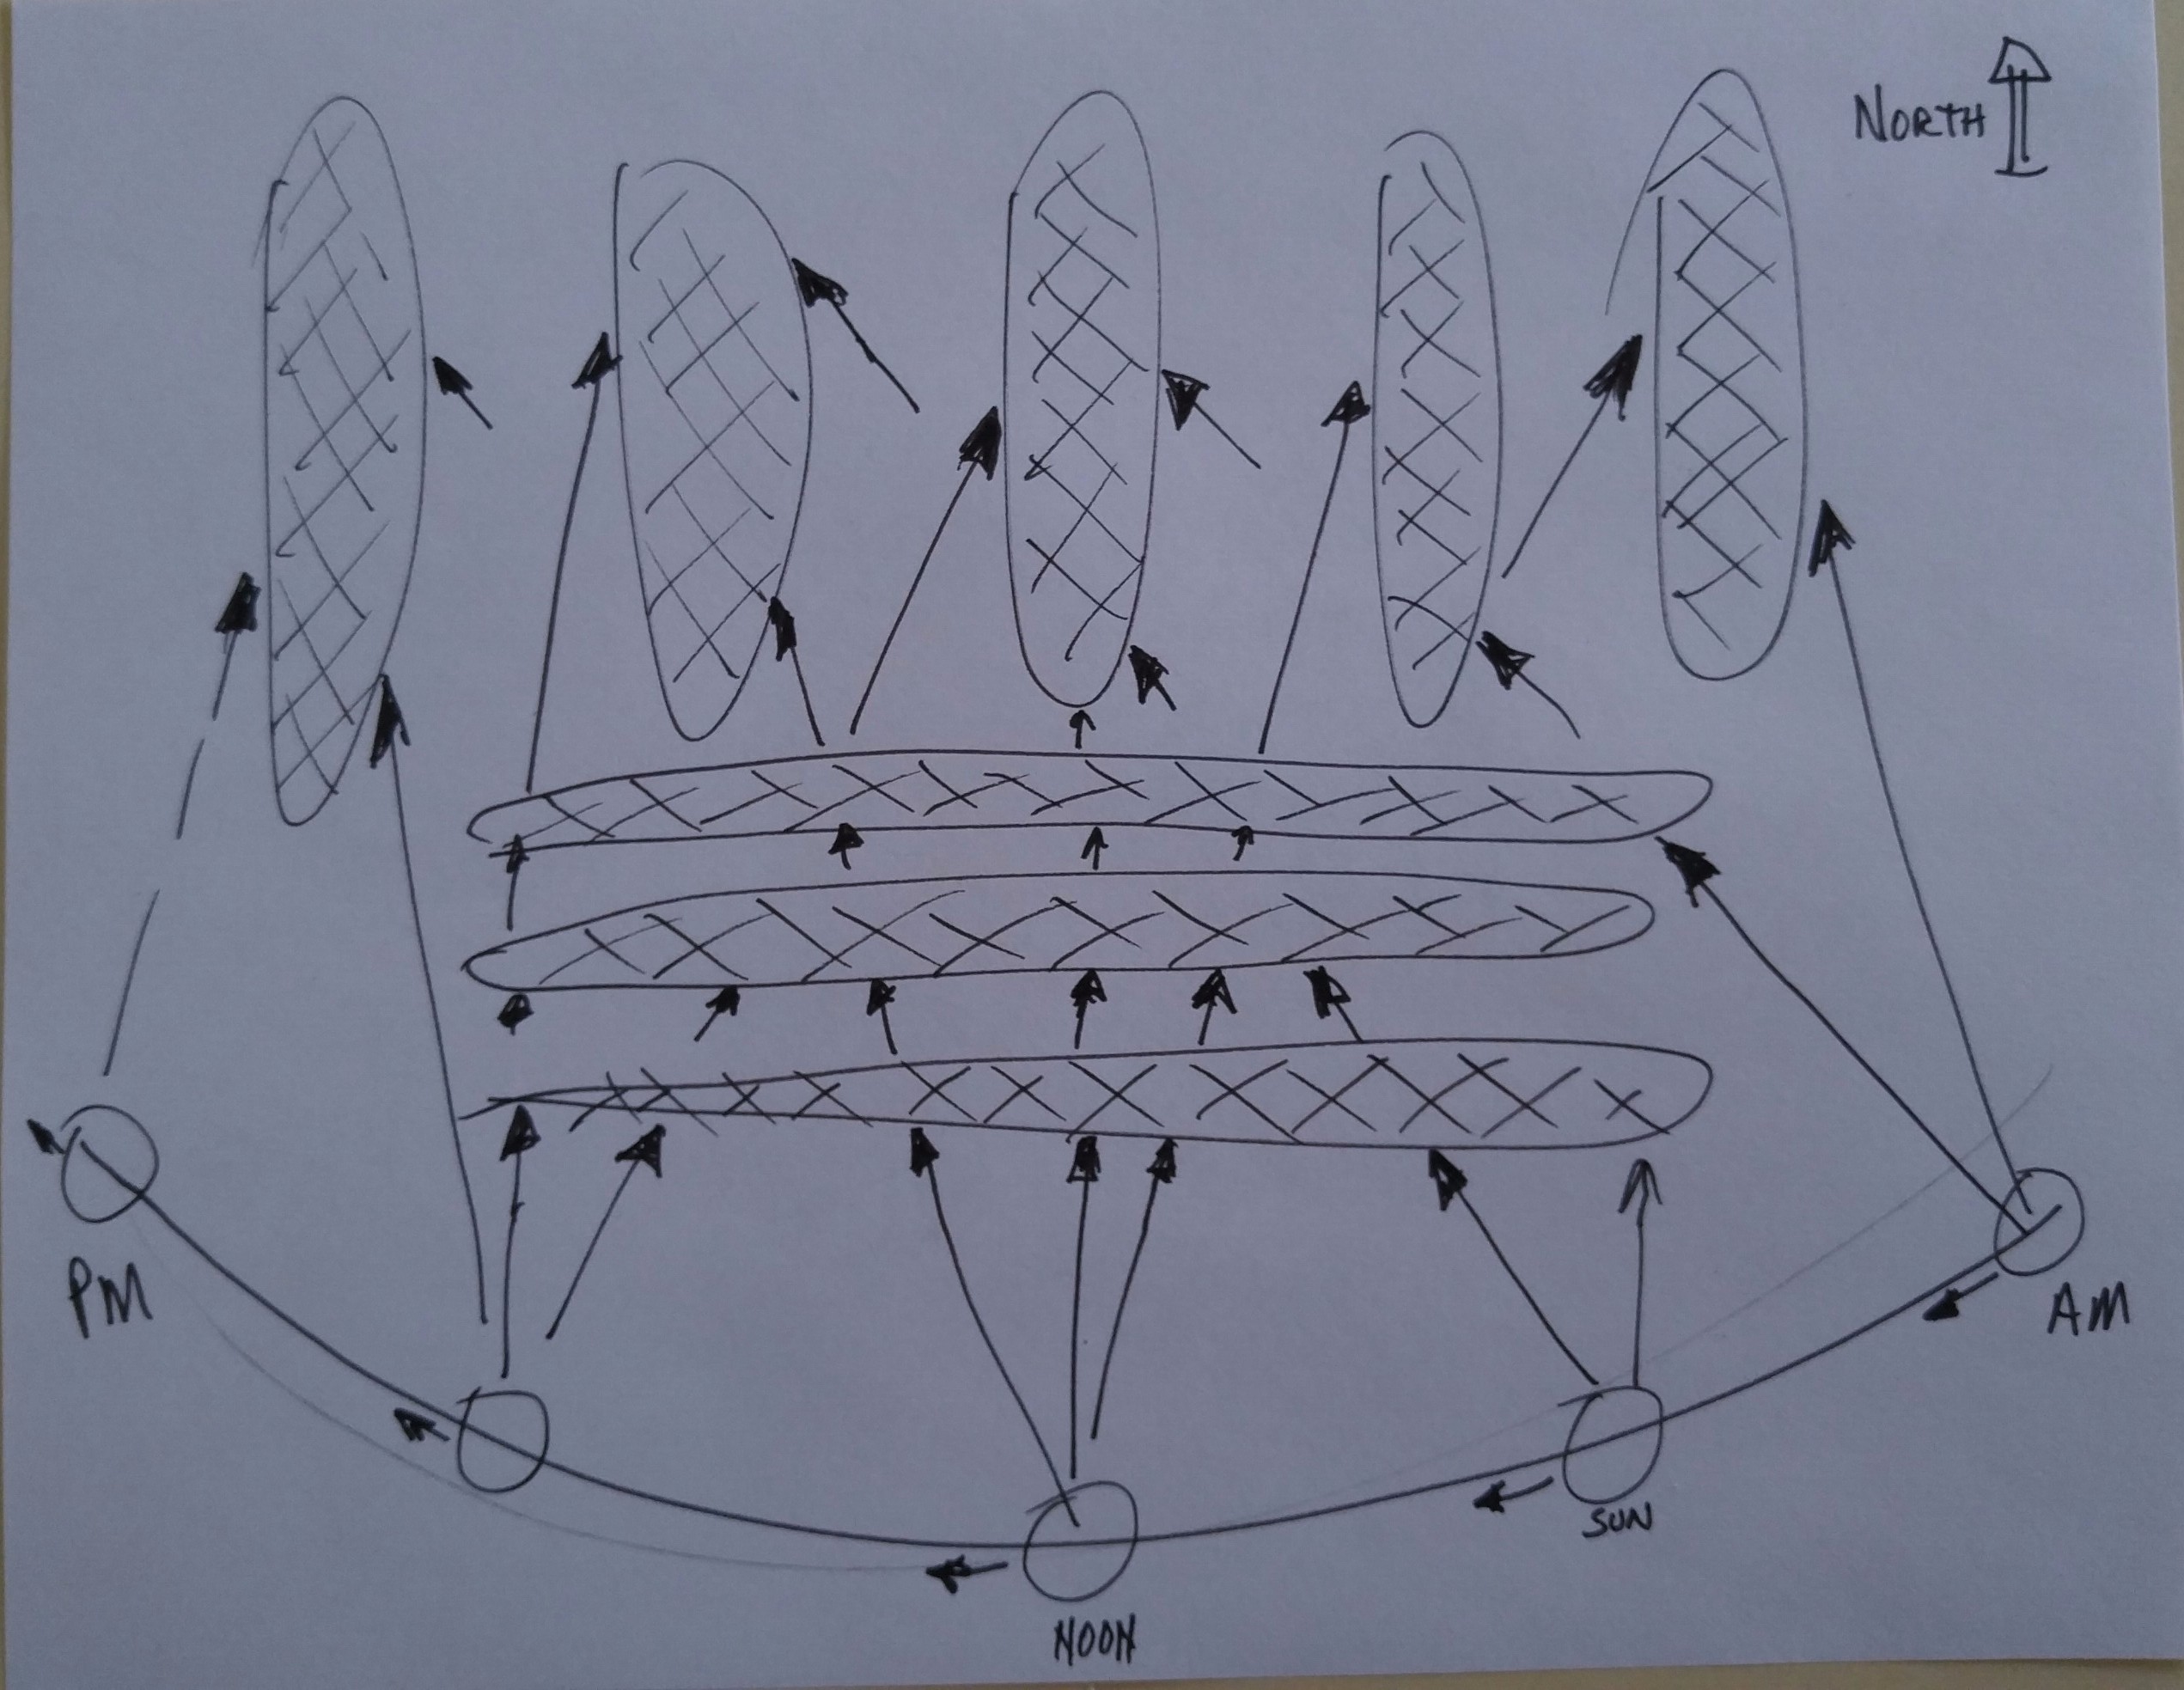
The cross-hatched areas represent rows of garden plants. The arrow heads represent rays of sunlight. Note how just the south side of the plants in the east to west rows receive sunlight. Sunlight penetrates deep into the rows that run north and south and contacts more of the surface area.
Not all gardens are situated facing a cardinal direction in an open area. Take for example a southeastern facing garden that is shaded from the afternoon sun. It should have its rows running northeast and southwest to receive the fullest amount of sunlight. Since the garden would get no direct sunlight in the afternoon, it would be a good idea to try to capture as much of that solar energy as possible.
We have a couple of months before our main outdoors planting happens. So now is a great time to sketch out a diagram of of your garden that, in addition to the size and shape, includes direction, and potential sunlight.
Bob