The Yellow Farmhouse Garden

April 15, 2018

Spring planted garlic

Filed under: Herbs,Planting,Vegetables — Tags: , , , , — bob @ 8:48 am

Garlic is normally planted in the fall. Planting at that time of the year allows the garlic bulb to be exposed to several weeks of cold temperatures which stimulates bulb production. Missing the fall date can be disappointing, it means waiting an entire year before planting a crop.

If you are the type of person who doesn’t mind experimenting a bit, spring planting may be a option. Bulbs grown from spring planted garlic are significantly smaller which is why it is not recommended. Farmers would never be able to make a profit with an undersized crop, but in a garden it is worth having some fun with.

The other thing with spring planted garlic is finding bulbs to plant since most seed companies ship their garlic in the fall. One solution is to plant garlic from the supermarket produce department. You’ll never know what variety you’ll be getting but look at it this way, someone had a good enough crop with them to grow enough to sell.

Even though spring planted bulbs will be smaller, that doesn’t mean they will not be usable. You’ve probably eaten green onions before, you can eat green garlic too. If you’ve never tried fresh green garlic right from the garden, you’re in for a treat. The garlic taste is quite unexpected when your taste buds are expecting an onion flavor.

Don’t let them get too mature though. Green onions or scallions that swell up at the root end as they get older are still quite usable. Green garlic at that stage will start to develop the separations that eventually become cloves. When that happens tough membranes form that eventually become the papery wrappings over each clove that you see in full sized garlic. Those membranes make the young garlic too chewy to enjoy eating. At that point you just let them grow.

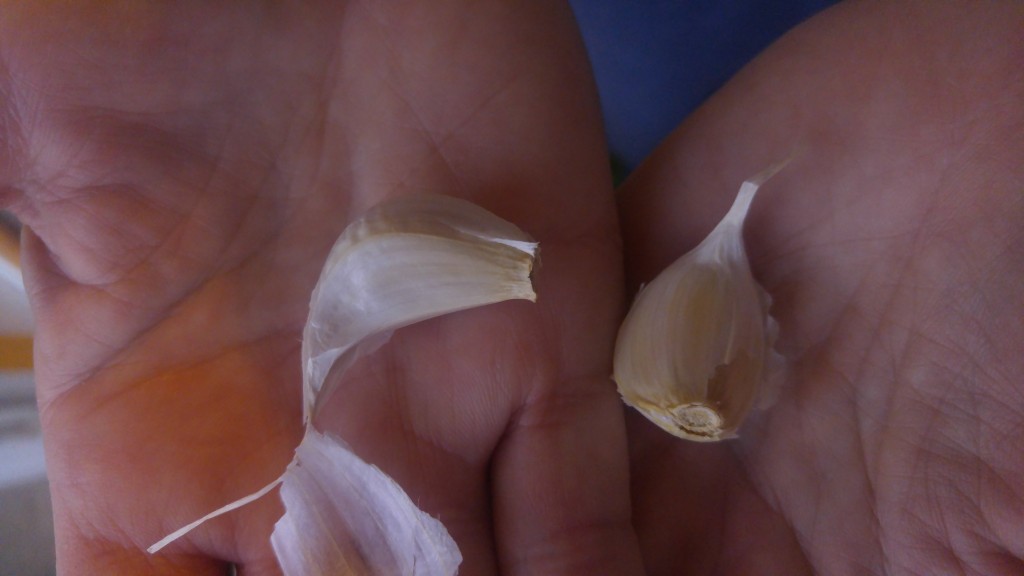
This is about the smallest size clove I would plant in the spring.

This is about the smallest size clove I would plant in the spring.

Since your spring planted garlic is late, you’ll have to give it every advantage to make growth. The first important thing to remember is garlic hates to be planted on it’s side. It’s critical that you plant the garlic clove with the bottom pointing down, don’t just toss it into a hole otherwise you’ll reduce the size of the mature bulb even more.

In your richest area of your garden, dig your planting hole so that top of the clove is covered by about two inches of soil. Plant the cloves between 3 and six inches apart; the closer spacing for green garlic, the more distant for garlic bulbs.

Early and season long weed control is essential, garlic just doesn’t compete well with weeds. Kill those weeds while they’re still little and keep it up all through the season. Make sure the soil is kept evenly moist but not soaking wet. The object is to try to encourage the garlic to grow as much as it can early in the season so that it will have plenty of green leaf area for photosynthesis.

If you’re going to do this thing, do it now — don’t wait until May. Garlic needs as much cool soil as you can provide during the early stages of growth.

With some care and persistence, you’ll end up with a culinary conversation piece that will surprise your garlic loving friends.

Bob

Bob
January 11, 2018

Start your onion seeds in January

Onions are a staple in our kitchen and I’m guessing are in yours too. While homegrown vegetables are always the best, it’s especially true with onions.

Those little onion bulbs, called sets, that you find in the garden center were grown last year from an onion variety selected for good storage characteristics, not flavor. I have to confess that I’ve used them plenty of times in the past during those years when I was not able to grow my own transplants.

Not only do homegrown onions in general taste better, you can pick and choose the variety you want without having to depend on what the local garden center has to offer. There are all kinds of gourmet onions available that you can only get if you grow them yourself. Just stay away from short-day varieties, they are not adapted to our latitude.

The secrete to growing onions from scratch is to get started early. I try to sow my onion seeds indoors sometime during January.

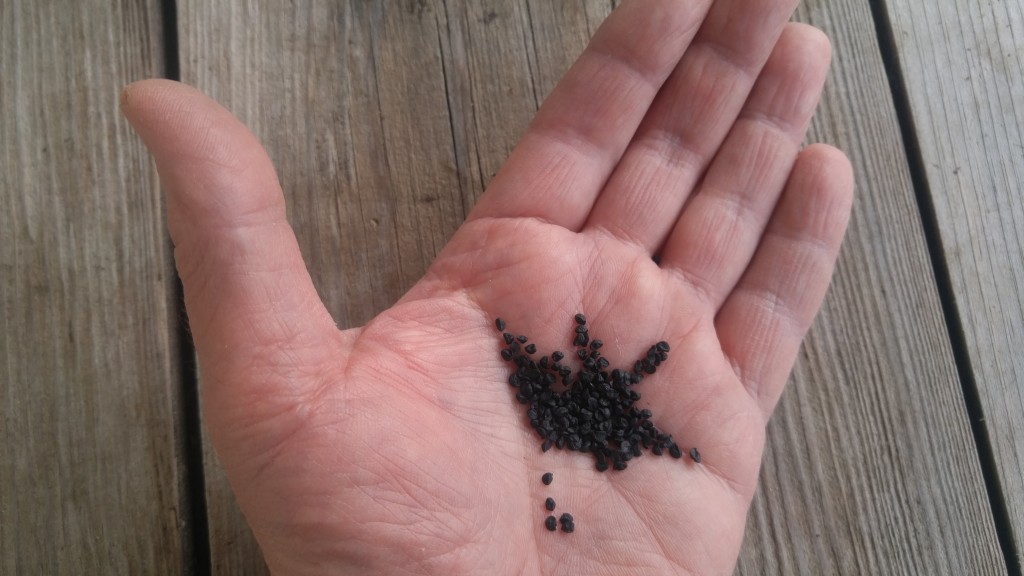
Onion seeds are fairly small so don't cover them too deeply.

Onion seeds are fairly small so don’t cover them too deeply.

Onion seeds are fairly easy to grow. Compared to many vegetables such as tomatoes, peppers and others, onions don’t require as much attention. With most other vegetable seedling, transplanting from a crowded container into individual pots or cells is absolutely necessary, that’s not so critical with onions. They do quite well growing close together like a clump of grass during the early stage of their life cycle.

To get started, sow onion seeds into clean containers, I use six inch plastic flower pots. They’re easy to wash and sterilize and can be used year after year.

Fill your growing container an inch or so from the top with a good starting mix, other types of potting mixes may be used if the manufacturer didn’t add too much fertilizer.  Gently firm the soil down and moisten it.  Sprinkle your onion seeds evenly over the surface of the soil –about 50 -60 seeds will fit nicely in a six inch pot. Cover the seeds with about a quarter inch of the starting mix and firm it down so it makes good contact with the seeds. Lightly water the pot.

You should start to see the tiny seedlings begin to emerge in about a week to ten days at 70 degrees F. Once they’ve emerged, place the pot in a sunny area and drop the growing temperature to the lower 60′s during the day and upper 50′s during the night. If you grow your seedlings under artificial light only, give them ten hours of light a day. Keep them moist but not soaking wet.

Occasionally fertilize your growing plants according to directions on the fertilizer package. The onions will sometimes grow so much that they will fall over. If that happens l cut back the tops a little bit with  a pair of scissors. Our goal is to get the plants about a quarter inch wide at garden planting time.

Since onion transplants can tolerate frost and cold soil temperatures, you can plant them into the ground as early as April. That will give them plenty of time to grow lots of leaves. The larger the onion plant is when it begins to form bulbs, the larger the onion will be. At planting time you just knock the plants out of the pot all together in one clump and pull them apart as you plant.

If you haven’t done so, order your onion seeds now so you can get them started soon.

Bob


November 16, 2017

Three impressive tomato varieties

Filed under: Disease,Vegetables — bob @ 12:12 pm

Earlier in this past growing season I took an informal survey of how a number of tomato varieties were responding to leaf spot diseases. You can go back and read the post to find out how things were going for them at that time.

I kept an eye on them through the season and watched their progress. In one garden I applied a couple of sprays of an organic fungicide, that didn’t seem to make much difference; it may have helped if I kept it up. As expected, on all of the plants, sprayed or not,  the leaf spot symptoms got progressively worse as the fruit on the plants began to grow and develop. It takes a lot of plant energy to produce a crop of tomatoes.

A curious thing happened on one variety at the end of the season. The heirloom variety, Granny Cantrell, began to shake off the fungal infection. While the other tomato plants lost pretty much all of their leaves and most of them actually died back, the Granny Cantrell plants shed their infected leaves and grew very healthy looking replacement leaves. That was something I’ve never seen in a tomato plant. Sure, many varieties struggle to send out more leaves but they never seem to amount to much. Not only were they growing leaves but they were also ripening existing fruit and producing new tomatoes to boot! Our growing season is too short for the plants to continue to grow so I’ll never know if the new shoots would have continued to grow without leaf spot symptoms. It may be a useful trait that tomato breeders could use to develop a new variety.

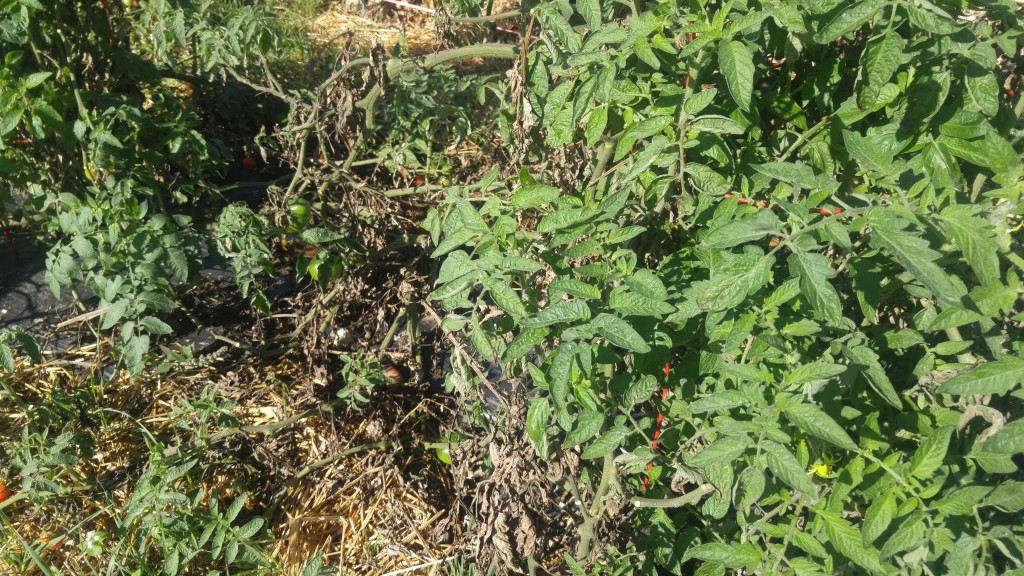
Notice the new green foliage on the Granny Cantrell plant on the right compared to the defoliated tomato on the left.

Notice the new green foliage on the Granny Cantrell plant on the right compared to the defoliated tomato on the left.

Juliet was another noteworthy tomato. They had good resistance to the diseases throughout the growing season and produced a huge crop of tomatoes, far out pacing any variety I grew this year.

All of the tomatoes I grew were tasty, how could they not be? since they were vine-ripened and eaten right after picking. All the people who tasted the tomatoes; and there were quite a few, agreed that Cherokee Purple was their hands down favorite. Cherokee Purple however,  had little disease resistance and didn’t produce very many tomatoes at all. They also have very thin skin making the very hard to handle without damaging them. They are not a typical red tomato so their coloring made it harder to distinguish when they were ripe. Also their flesh inside has a distinctive purple hue that, along with their taste makes the quite memorable.

Bob


August 15, 2017

Sunflowers can cause problems in the garden

Plants have developed an number of different survival techniques that can give them advantages over other plants competing for the same growing space. For example, some plants have roots that produce chemicals that inhibit the growth of other nearby plants of other species. It’s a process known as allelopathy.

Black walnut trees are probably the most recognized allelopathic plants. Homeowners find that it’s impossible to grow many kinds of plants in the root zone of a black walnut tree. Although they work differently than black walnuts, many farm crops such as alfalfa, buckwheat, winter rye and others are alleopathic plants.

Sunflowers provide a wonderful backdrop in the garden as they tower over a space making them a favorite of many gardeners. What gardeners might not know is sunflowers are also alleopathic plants. Because they have the ability to suppress the growth of weeds, sunflowers and other plants are the subject of on-going research to develop organic herbicides for use in sustainable agriculture. Unfortunately, along with weeds, many kinds of garden plants are affected by sunflowers as well.

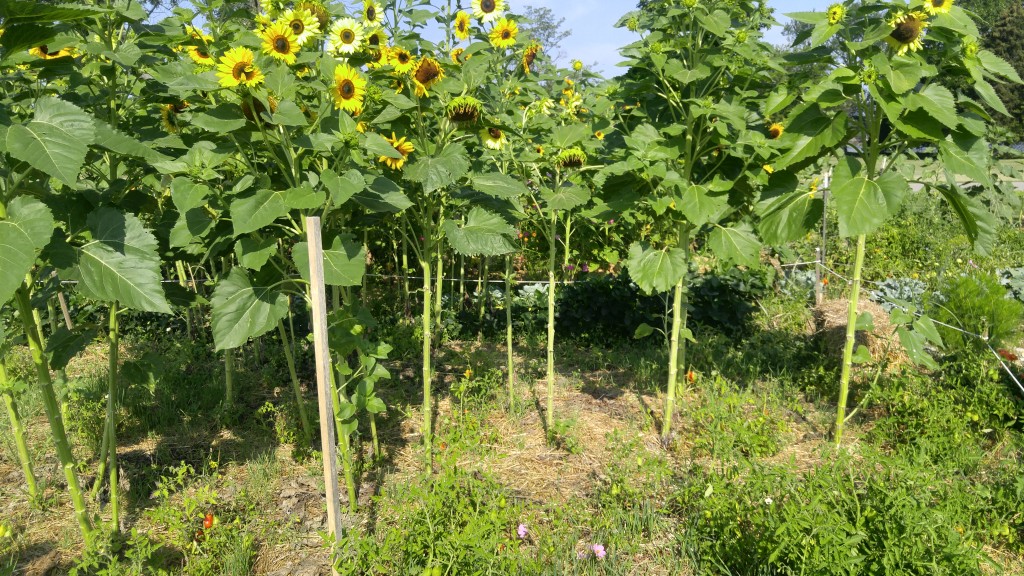
These tomatoes are struggling to grow near sunflowers.

These tomatoes are struggling to grow near sunflowers.


I’ve noticed tomatoes in particular have difficulty growing near sunflowers. Tomatoes are sensitive to some man-made herbicides too, especially certain broadleaf herbicides such as the common lawn weed killer 2,4-D. That makes the tomato plant a great indicator plant for the presence of herbicides and naturally occurring alleopathic substances, sort of like the canary in the coal mine.

Until you know which of your plants can tolerate growing near sunflowers, the best thing is to grow them in a separate bed away from other garden plants.

Bob

,

July 19, 2017

Tomato disease scores

This is the time of the season when tomato plants start showing signs of disease infections, usually as different shapes and colors of spots depending on which particular disease has infected the plant.

Last week I took an informal survey of several varieties of tomatoes to see how each variety is holding up under early disease pressure. My MO was to look for leaf spots on the plants. I made no attempt to identify which disease was causing  what spots. Then I ranked them on a scale of zero to ten depending how bad the plants looked. Zero meaning no spots were visible, ten meaning severe symptoms. No plants were bad enough to score what I imagined to be ten.

I didn’t count how many leaves were infected; or measure how many square centimeters were discolored; or brix levels of leaves; or levels of ethylene gas; or any other scientific criteria. Heck, I didn’t even alphabetize the list of varieties. I ignored any cultural differences such as mulch, staked or caged plants, planting history, etc. .Over half were heirloom varieties, some of those looked quite good compared to the modern ones.

I surveyed about fifteen gardens in two different locations about 20 miles apart. I made a point to look at them all the same day because twenty four or even twelve hours could mean the difference between no spots and spots. Here’s a chart of what I came up with:

Tomato variety Plant score
Brandywine 3-6
Belarus 0-1
Cherokee 1
Juliet 0-1
Sheboygan 0
Pruden’s Purple 0
Granny Crantrell 1-2
Super Sweet 3
Belstar 3
Pink Honey Drip 3
Roma 4-6
Yellow Cherry 5
Large Red Cherry 6
Early Girl 3-5
Rainbow Blend 3
Roma Type 7
Beefsteak type 6-7
Brandywine Pink 6
Moon Glow 3-4
San Marzano 3
Bobby’s Girl 0
Chadwick Cherry 0-1
Unknown varieties 5-6

Pruden’s Purple, by far looked the best it has no spots and  very vigorous leaves. Chadwick Cherry came in a close second. There were a few different beefsteak-type tomatoes that were not specifically tagged by variety but all of them had more advanced disease progression.

Keep in mind this is only a snapshot of conditions for one day. That could all change later on as the plants begin to get stressed by fruit production.

Bob


« Newer PostsOlder Posts »

Powered by WordPress